
Raipur Contemporary Courtyard Office
Project details
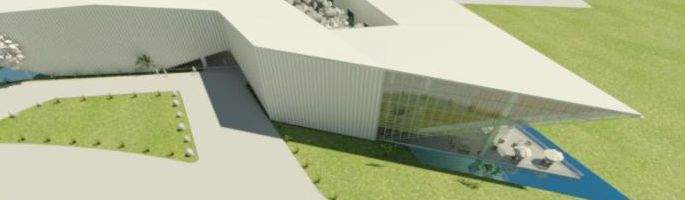
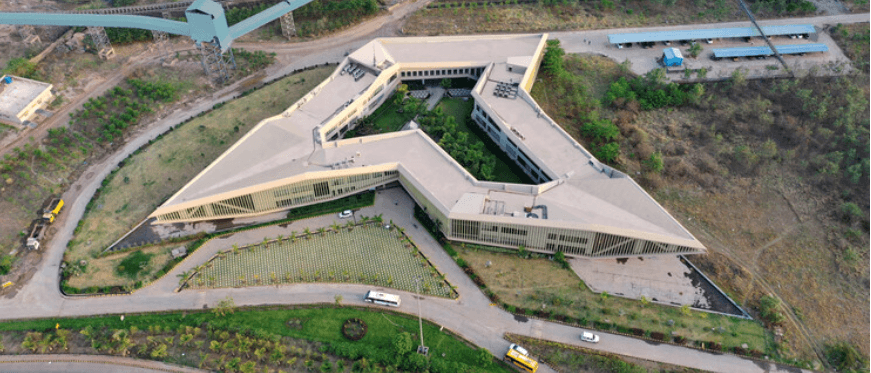
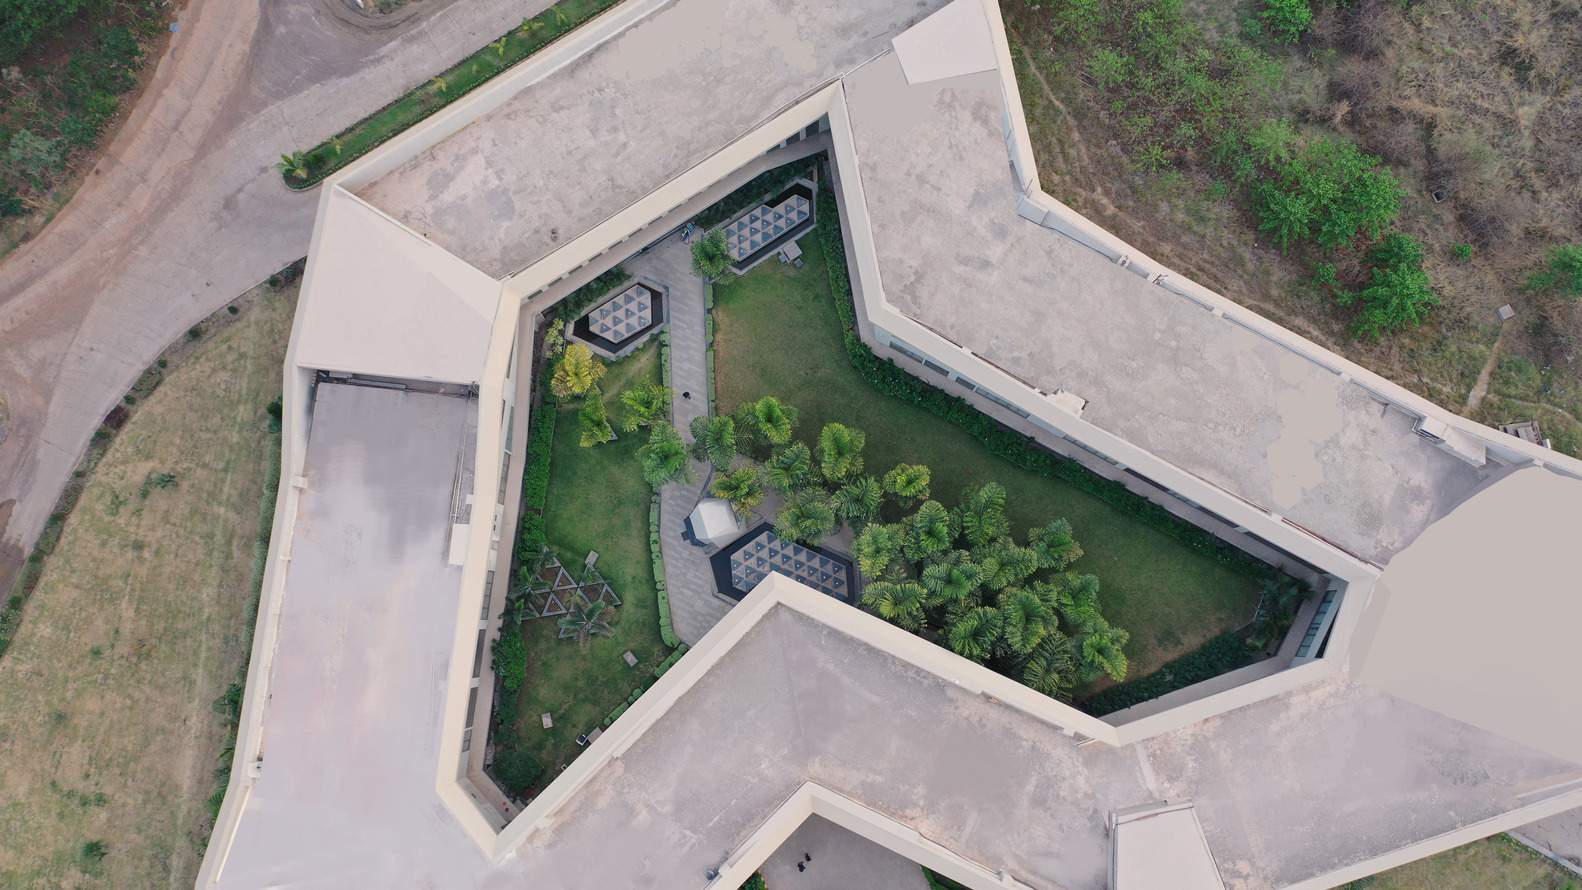
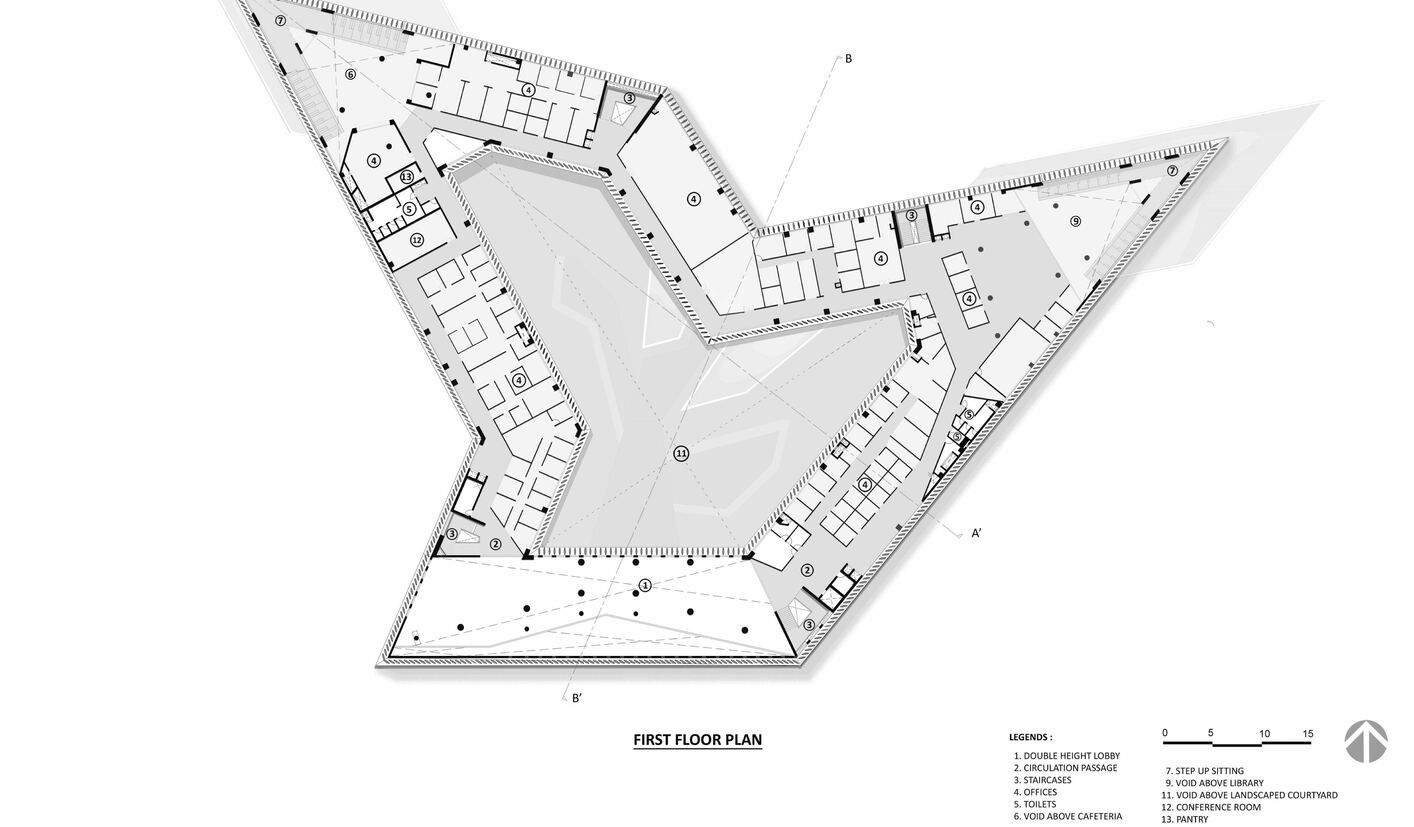
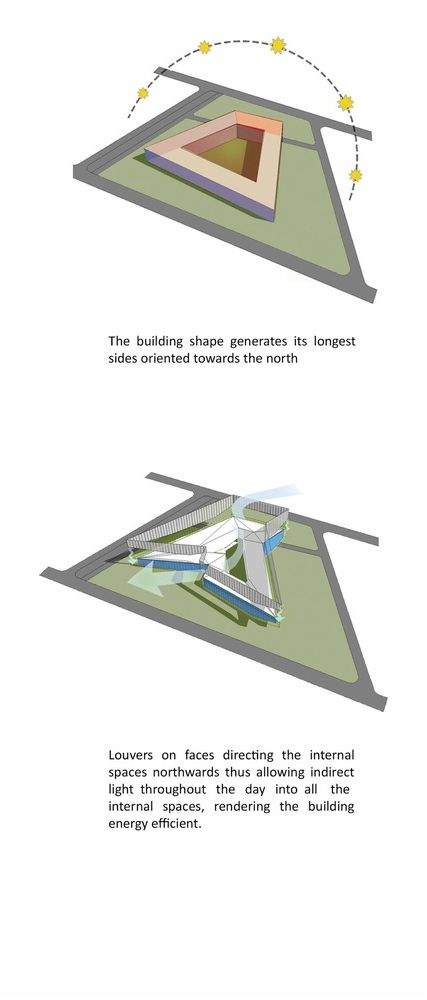
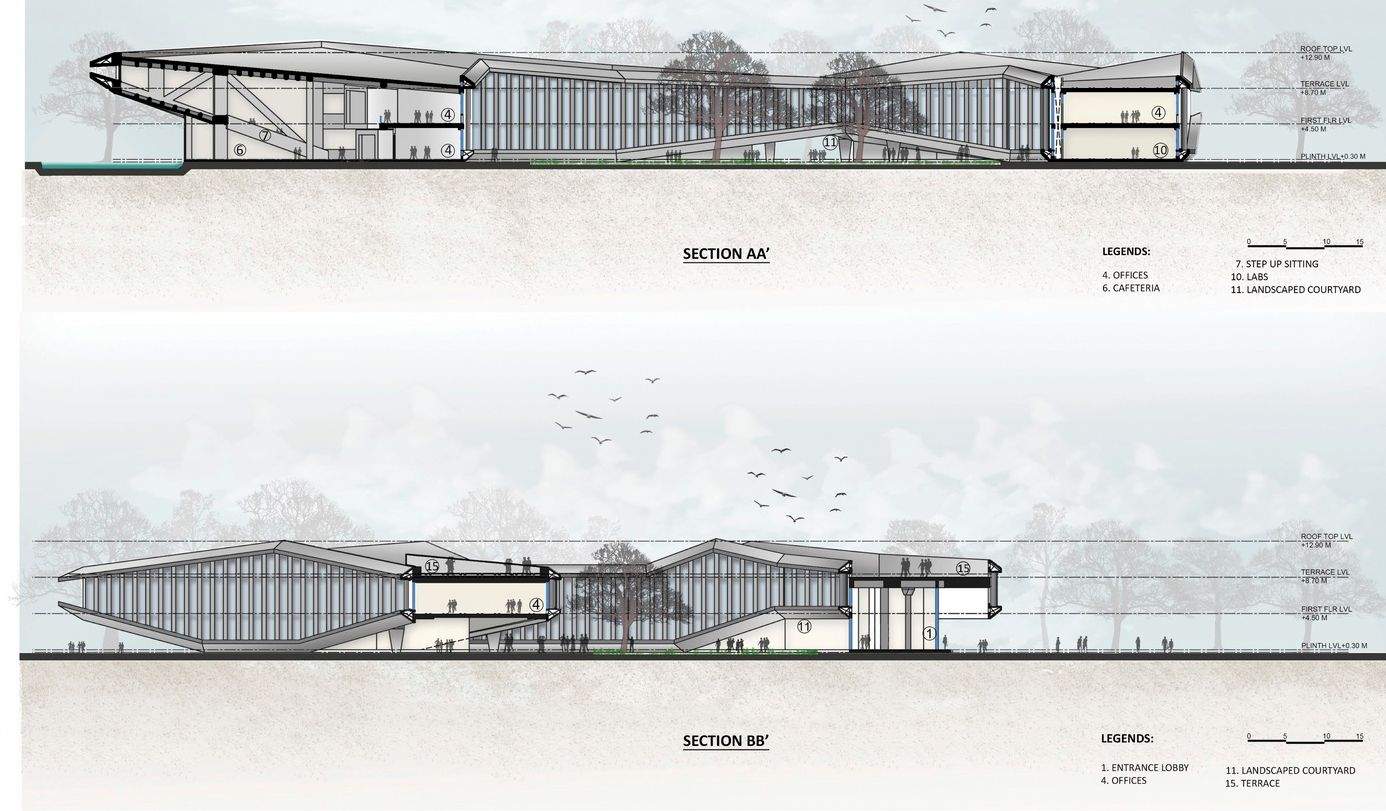
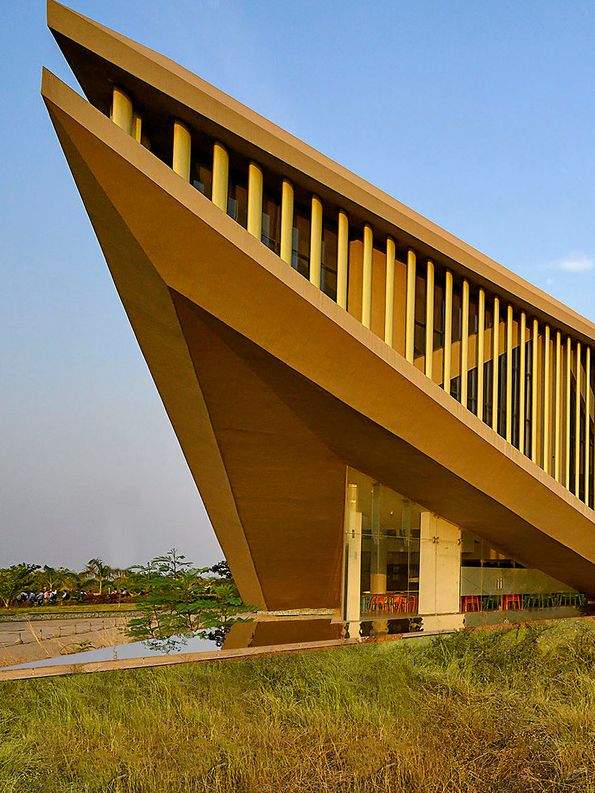
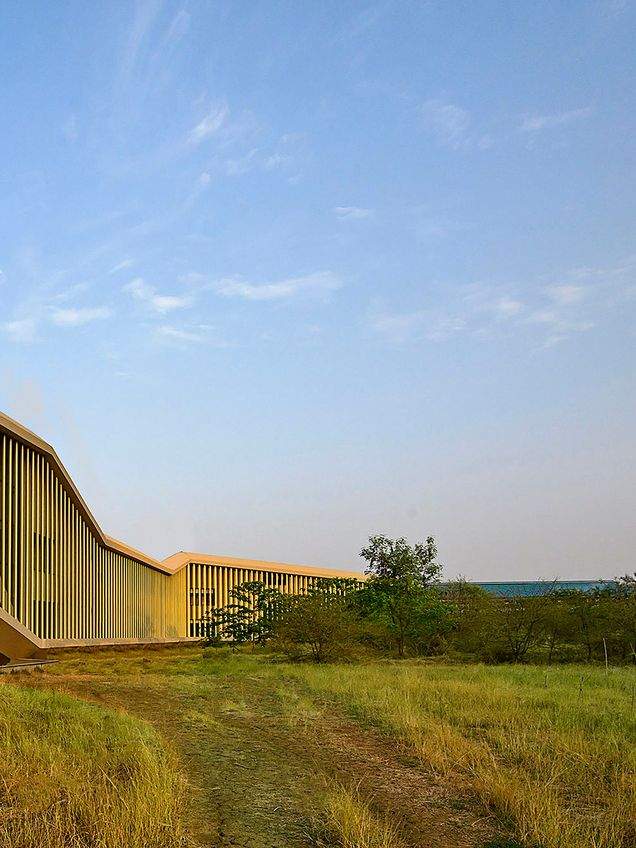
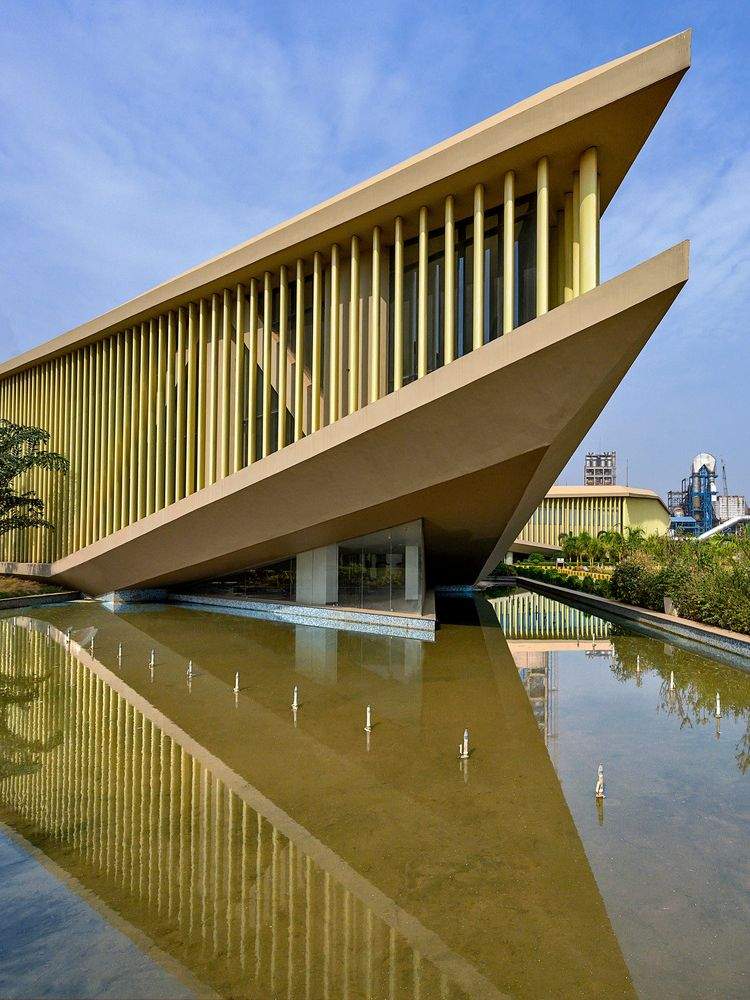
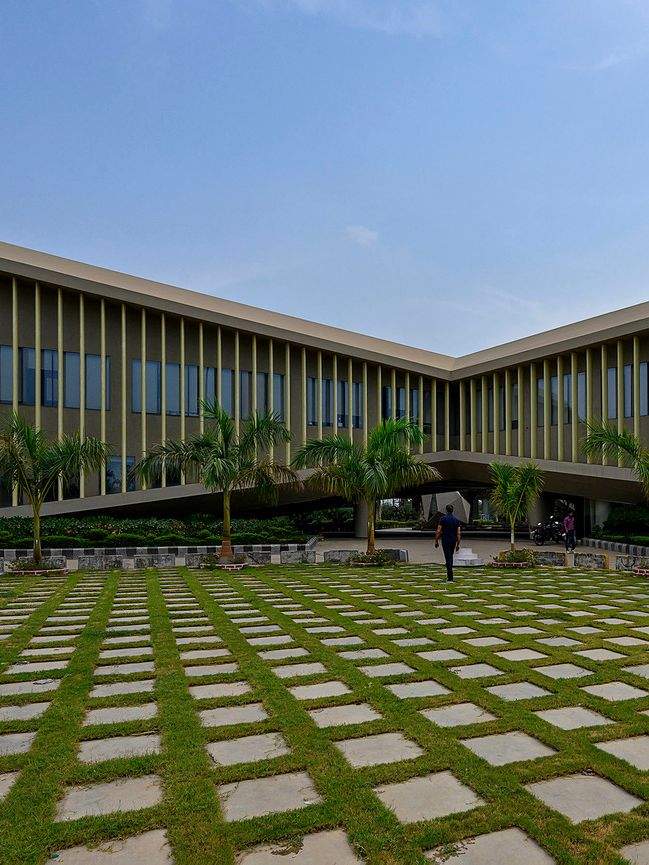
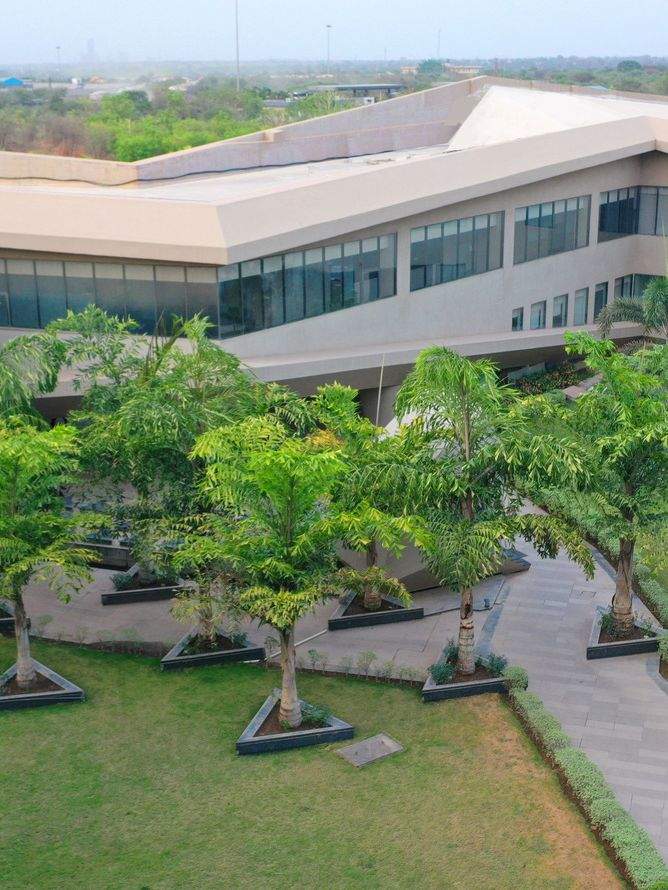
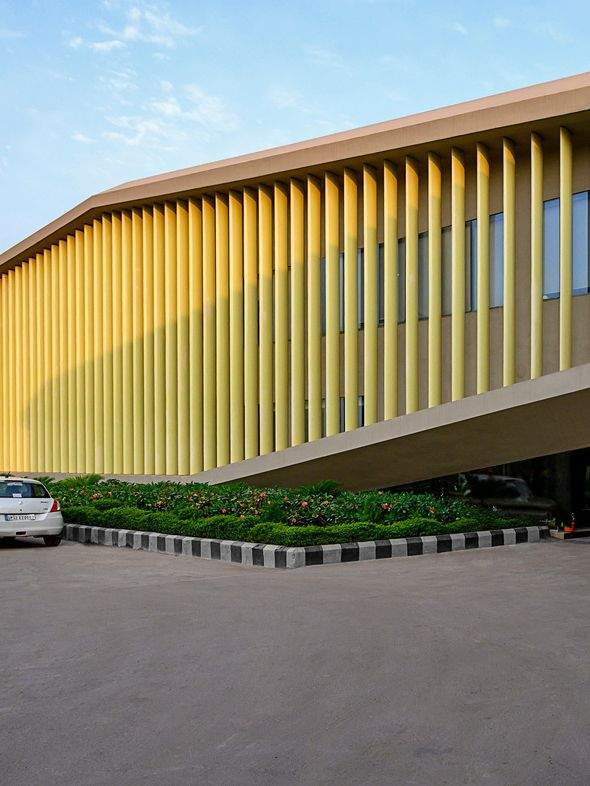
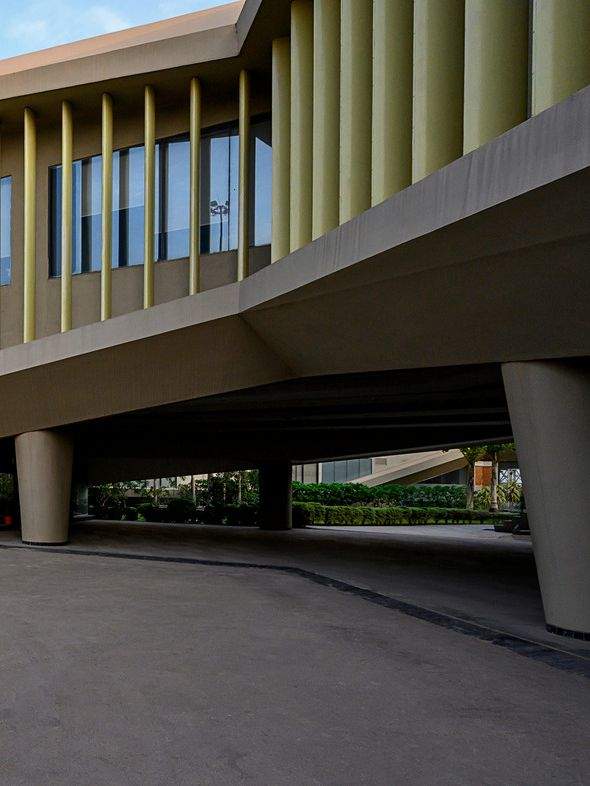
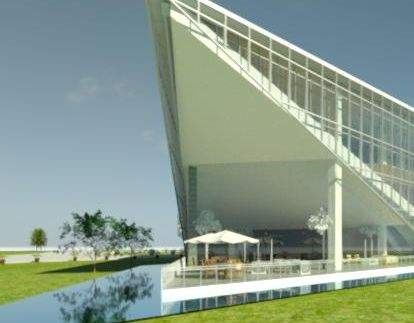
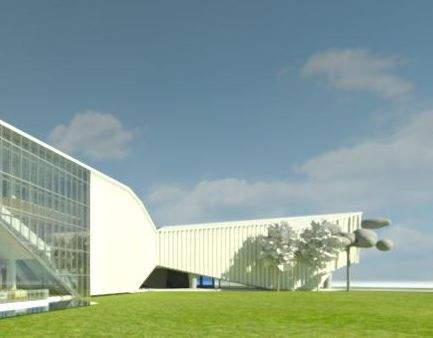
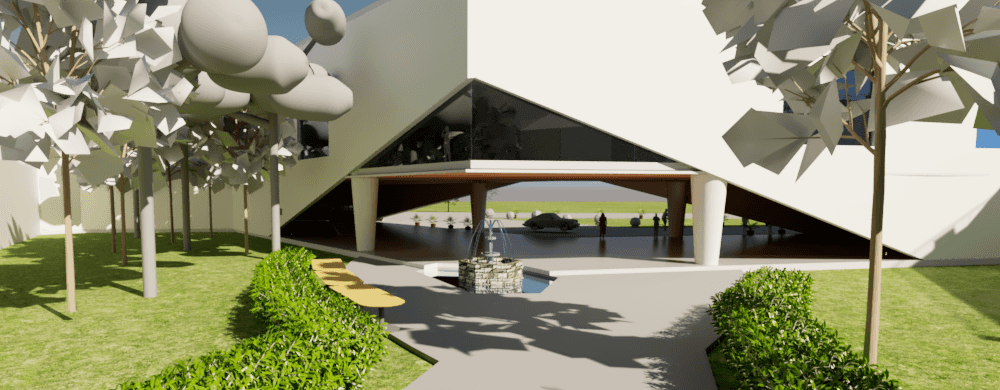
This project involves the 3D model replication of 'The Courtyard Office', as completed in 2020 by Sanjay Puri Architects in Raipur, India. A linear office space twists organically in the plan, naturally revealing a landscaped courtyard within its center. Varying from two to three levels sectionally, the office floors are lifted from the ground at the southwest and northeast sides to facilitate a south-westerly breeze through the courtyard.
As part of my Building Information Modeling Class (Revit), the objective for this assignment was to find a commercial building with accessible floor plans to replicate within Revit, and to provide our own construction document set for the project. Wanting to challenge my 3D modeling skills, particularly my manipulation of organic masses, I picked this challenging 88,000 sq. ft. office in Raipur.
Area of site | 88,860 ft2 |
Status of the project | Complete thru Construction Document Phase |
Tools used | Revit, Enscape |
Preliminary Phase:
Project Requirements & Site Study
This project began by allowing students to select a building to replicate within Revit. The only requirements for the selection were that it be a commercial building with at least two stories, at least 15,000 sq. ft, and that the current floor plans and at least two exterior sections of the build be accessible.
'The Courtyard Office' as completed by Sanjay Puri Architects ticked all of these boxes and then some. With a clever combination of louvers and lifting of the built volume at the southwest and northeast sides, this office excels in energy efficiency.
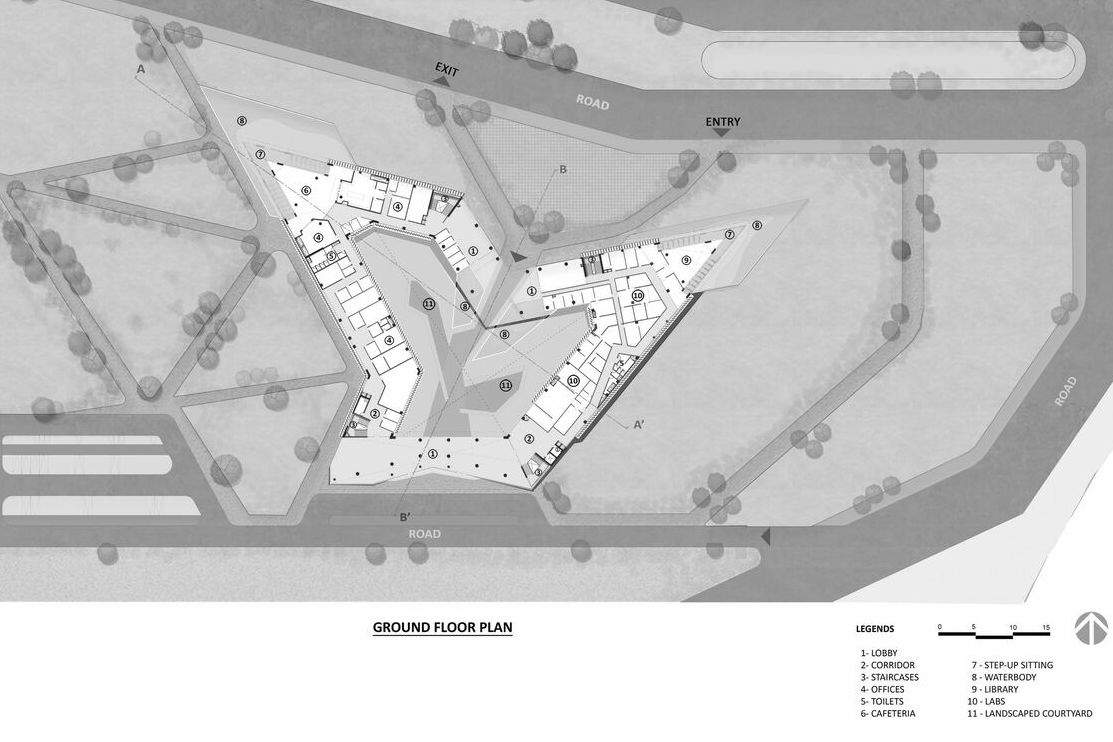
Following, are the floor plans, sections, and images of the office from Sanjay Puri Architects that had absolute guide over my recreation of the space. My recreation was of identical scale to the completed build.
Revit Model Construction & CD Set
Construction Document Set
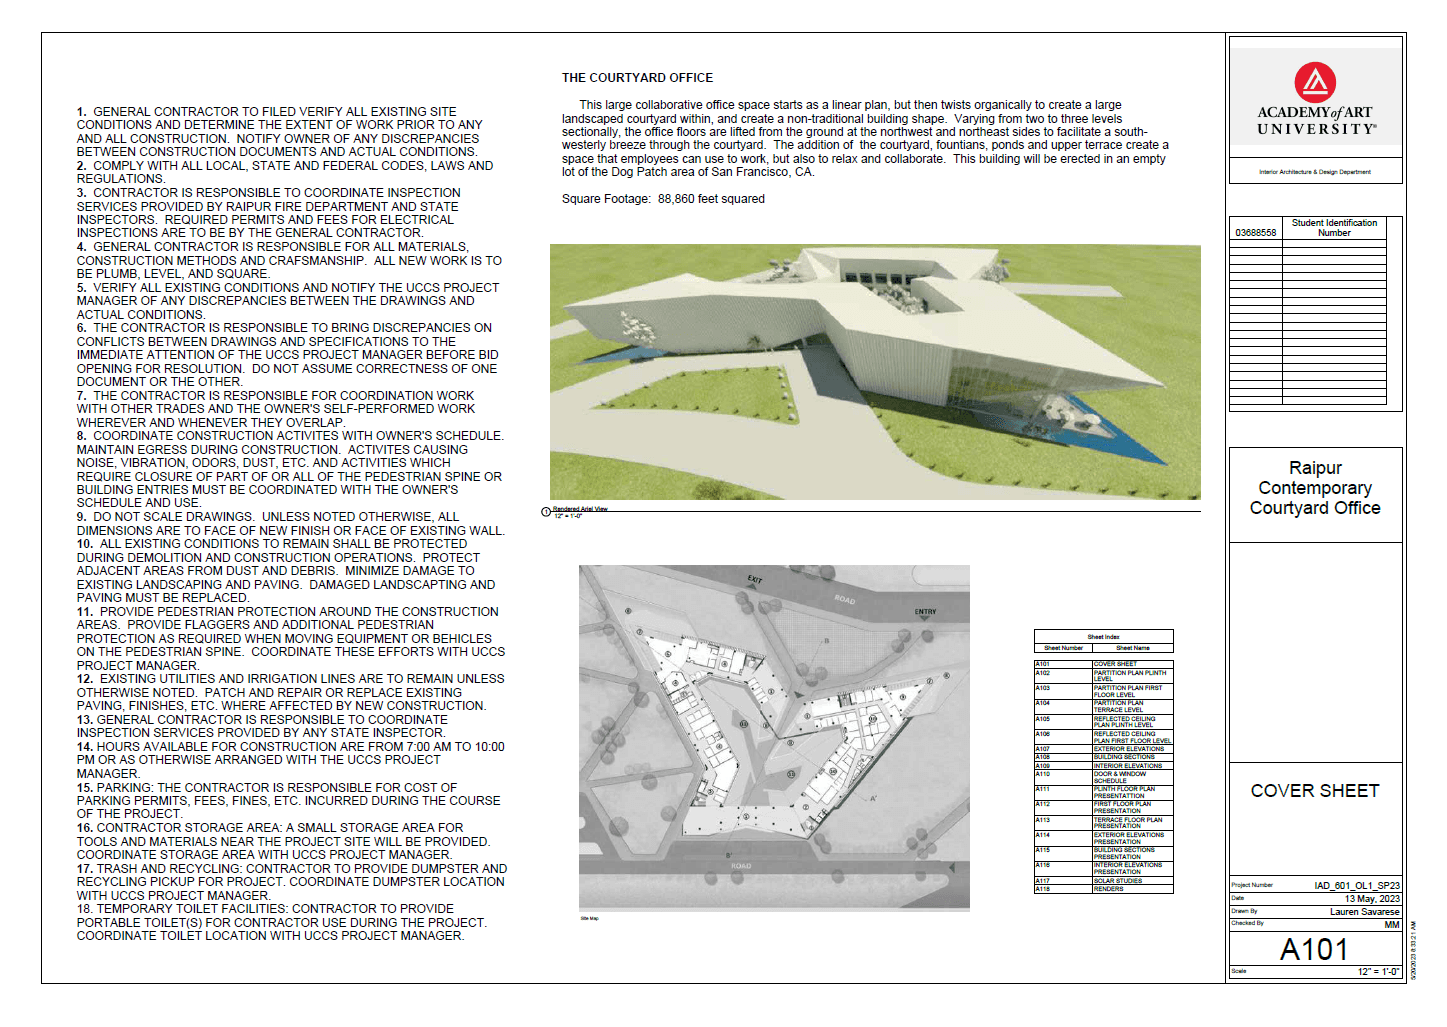
After building the model in Revit using the original floor plans, I created a sheet template and assembled a corresponding construction document (CD) set, detailing the project by level. The required sheets within the construction document set were as follows:
- Cover Sheet (Seen at right)
- Partition Plans
- Reflected Ceiling Plans
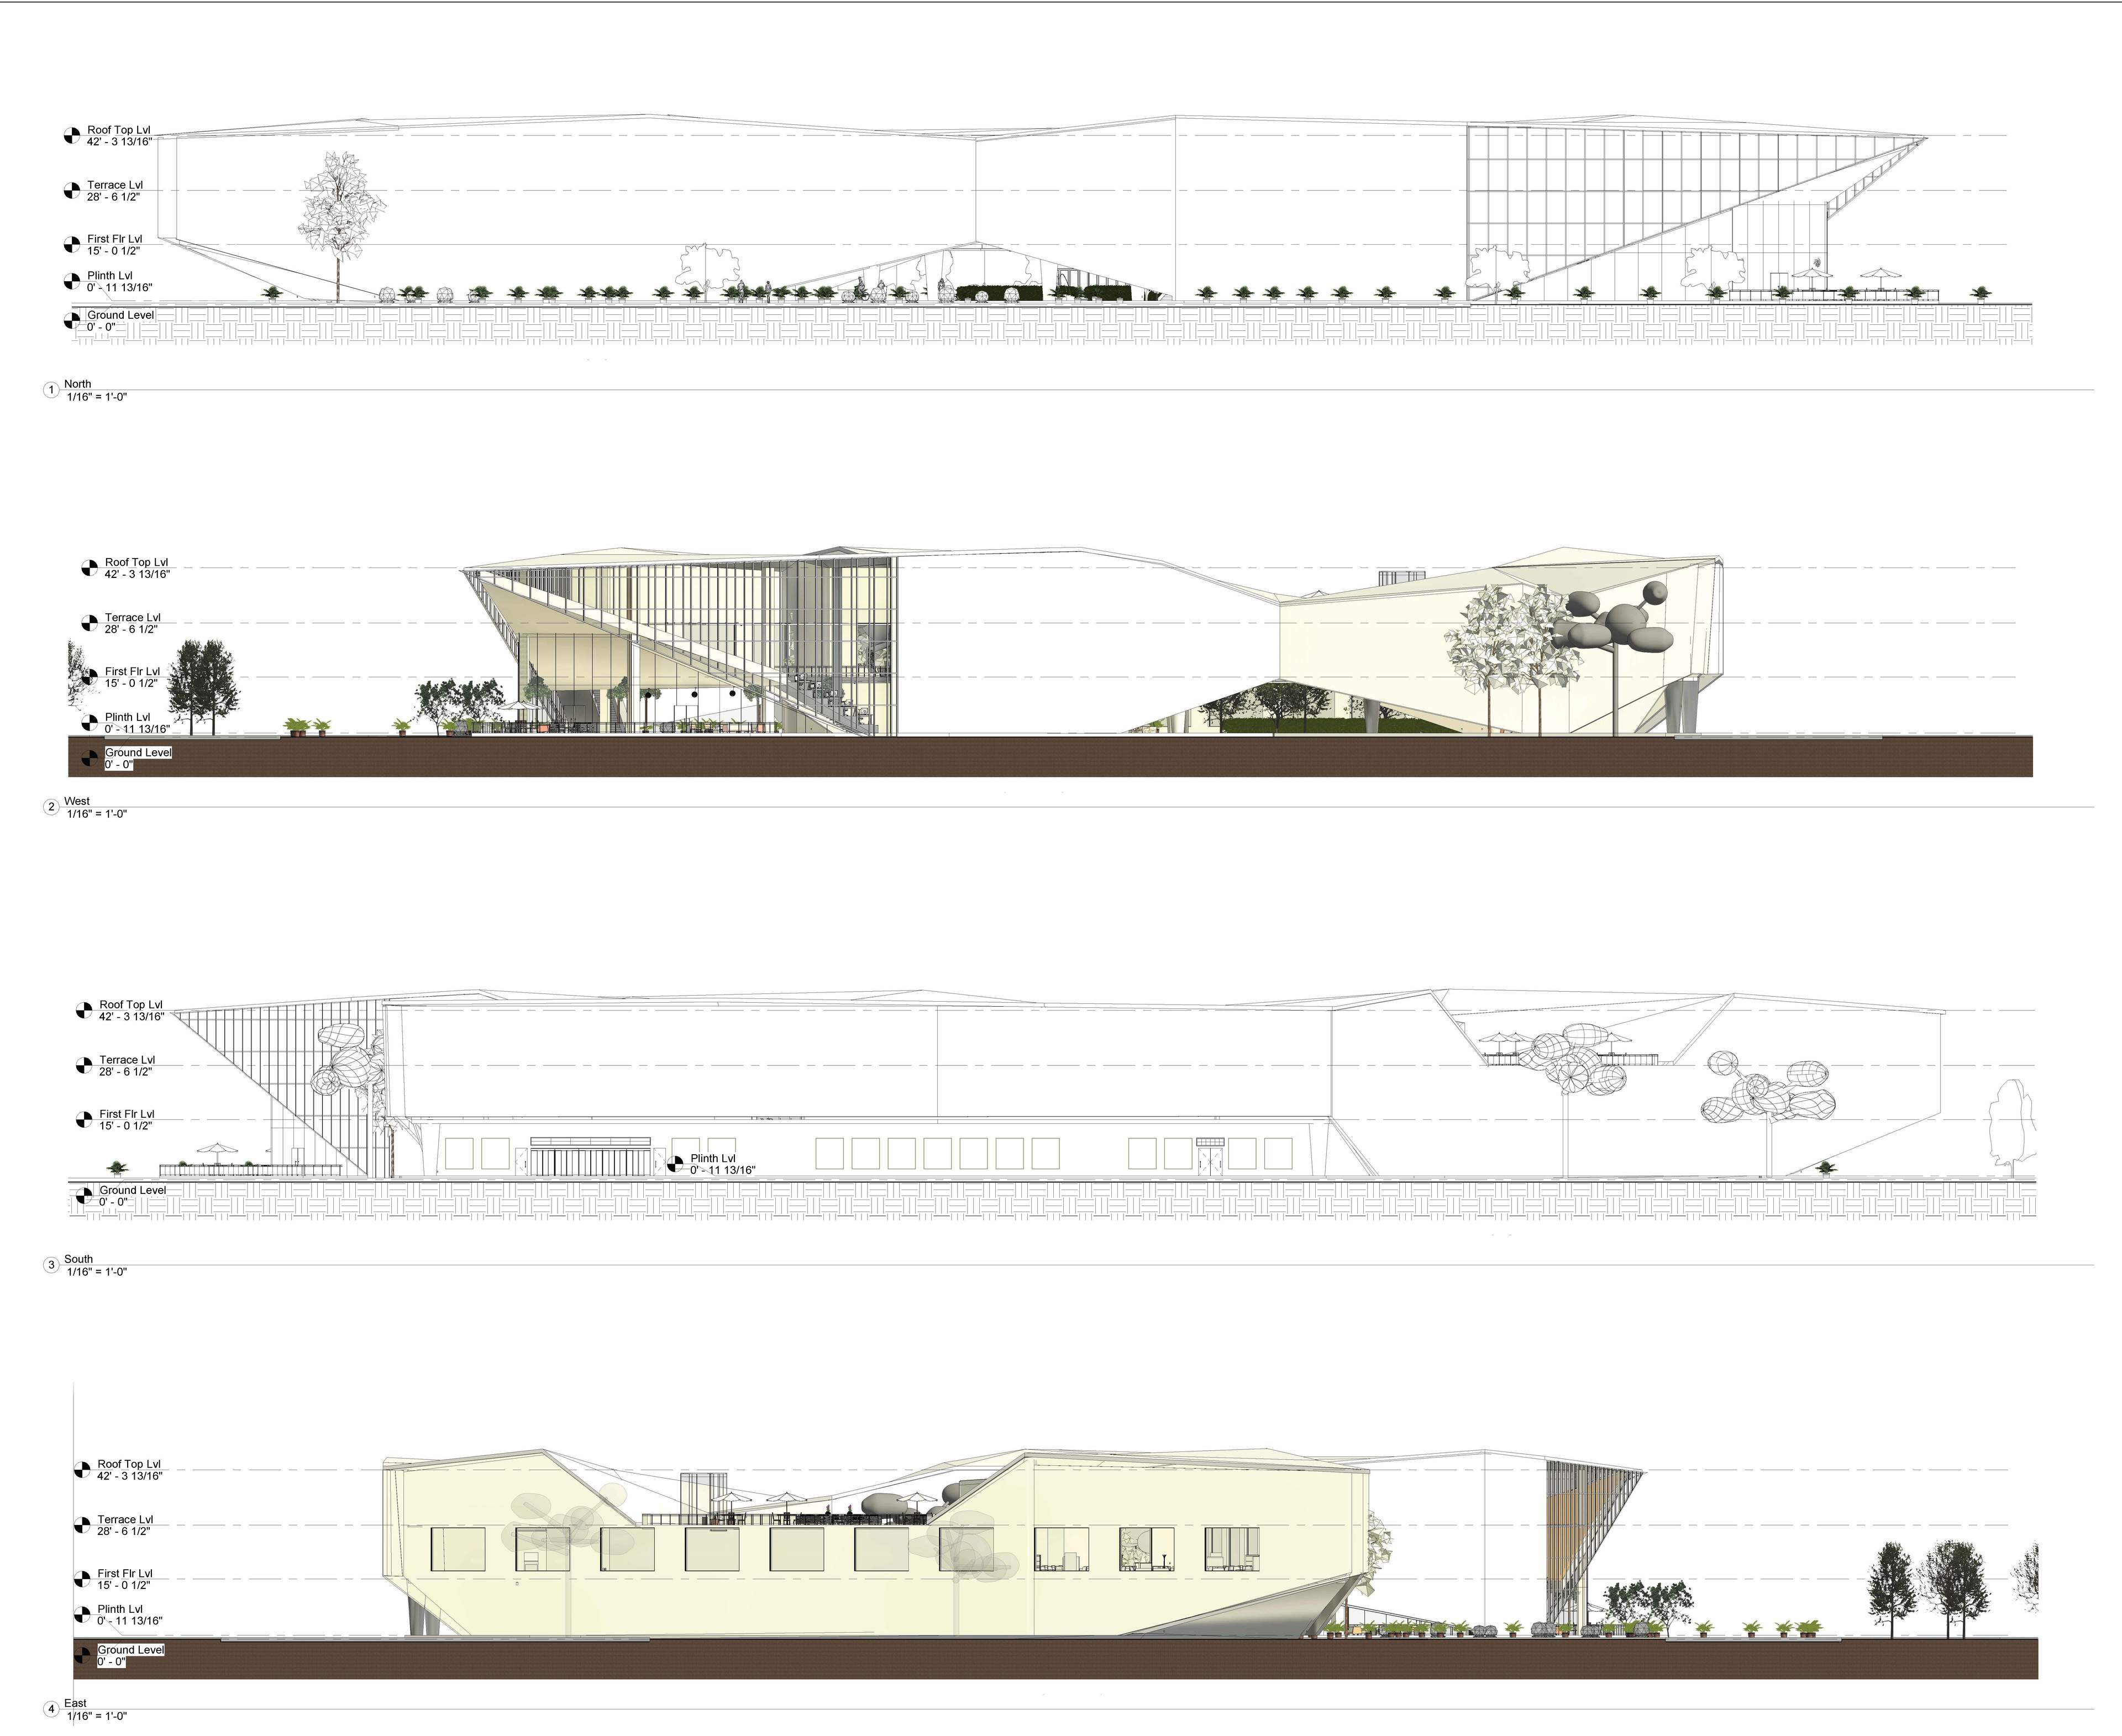
- Exterior Elevations
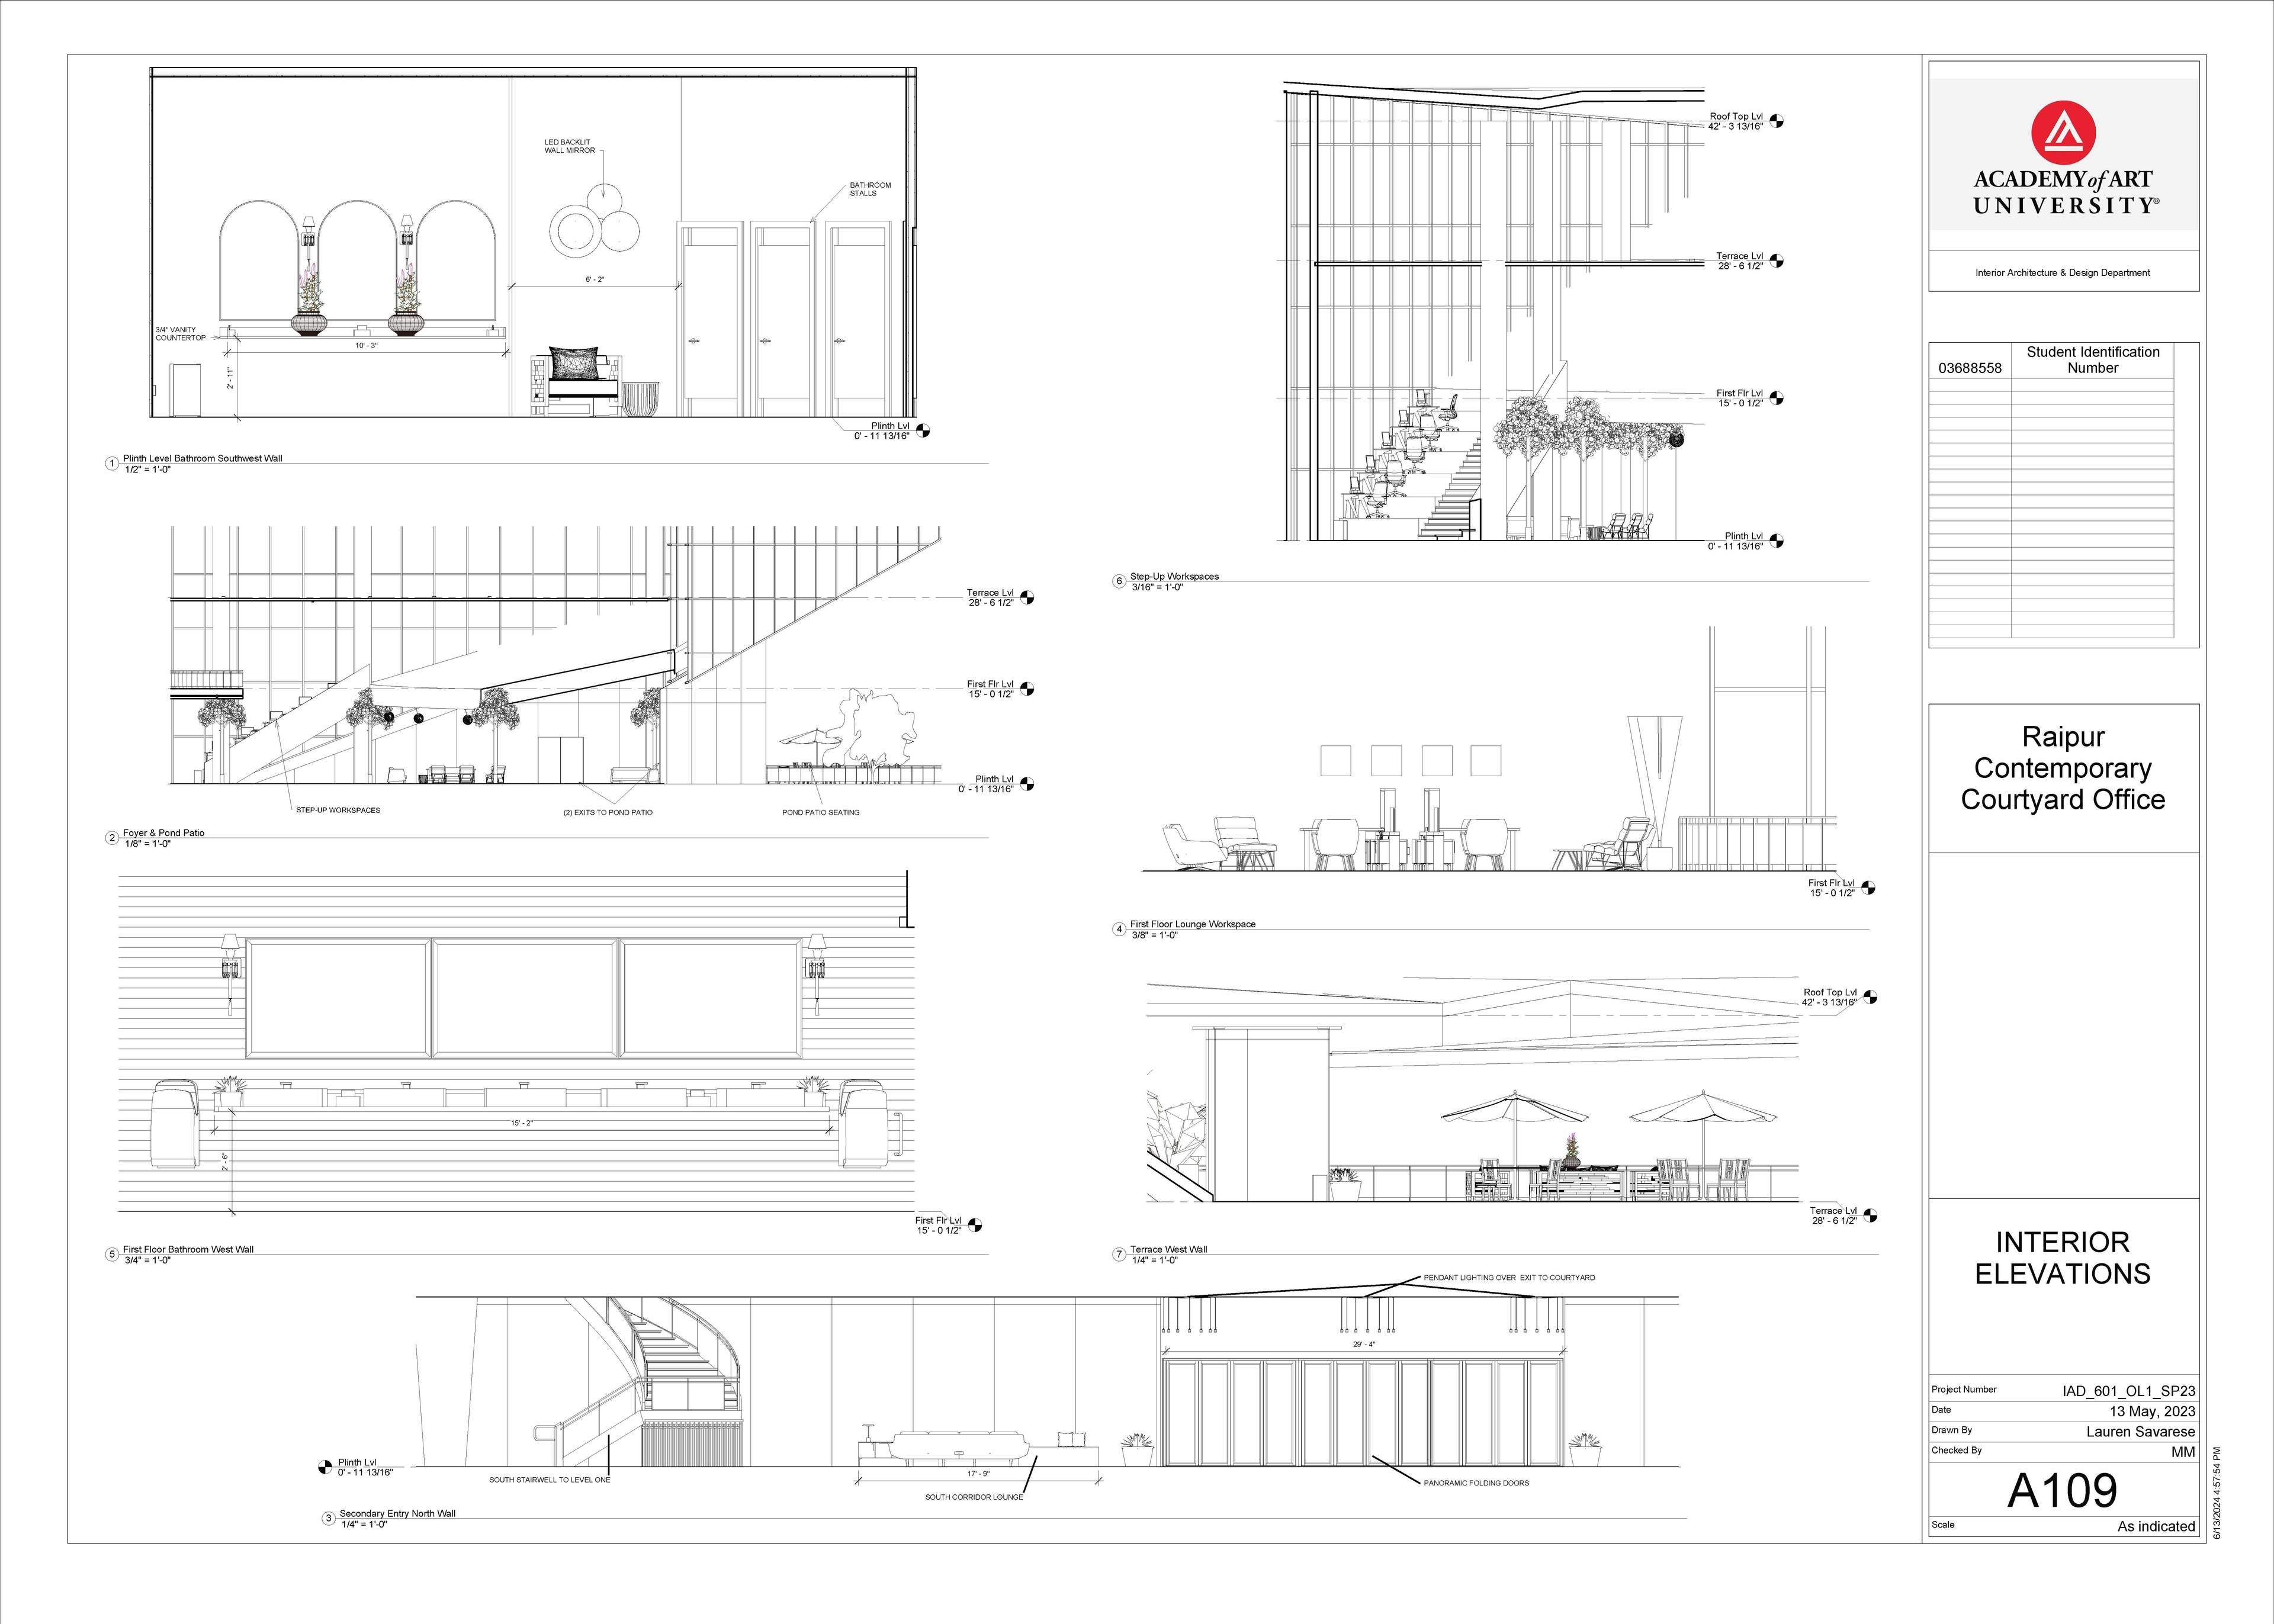
- Interior Elevations
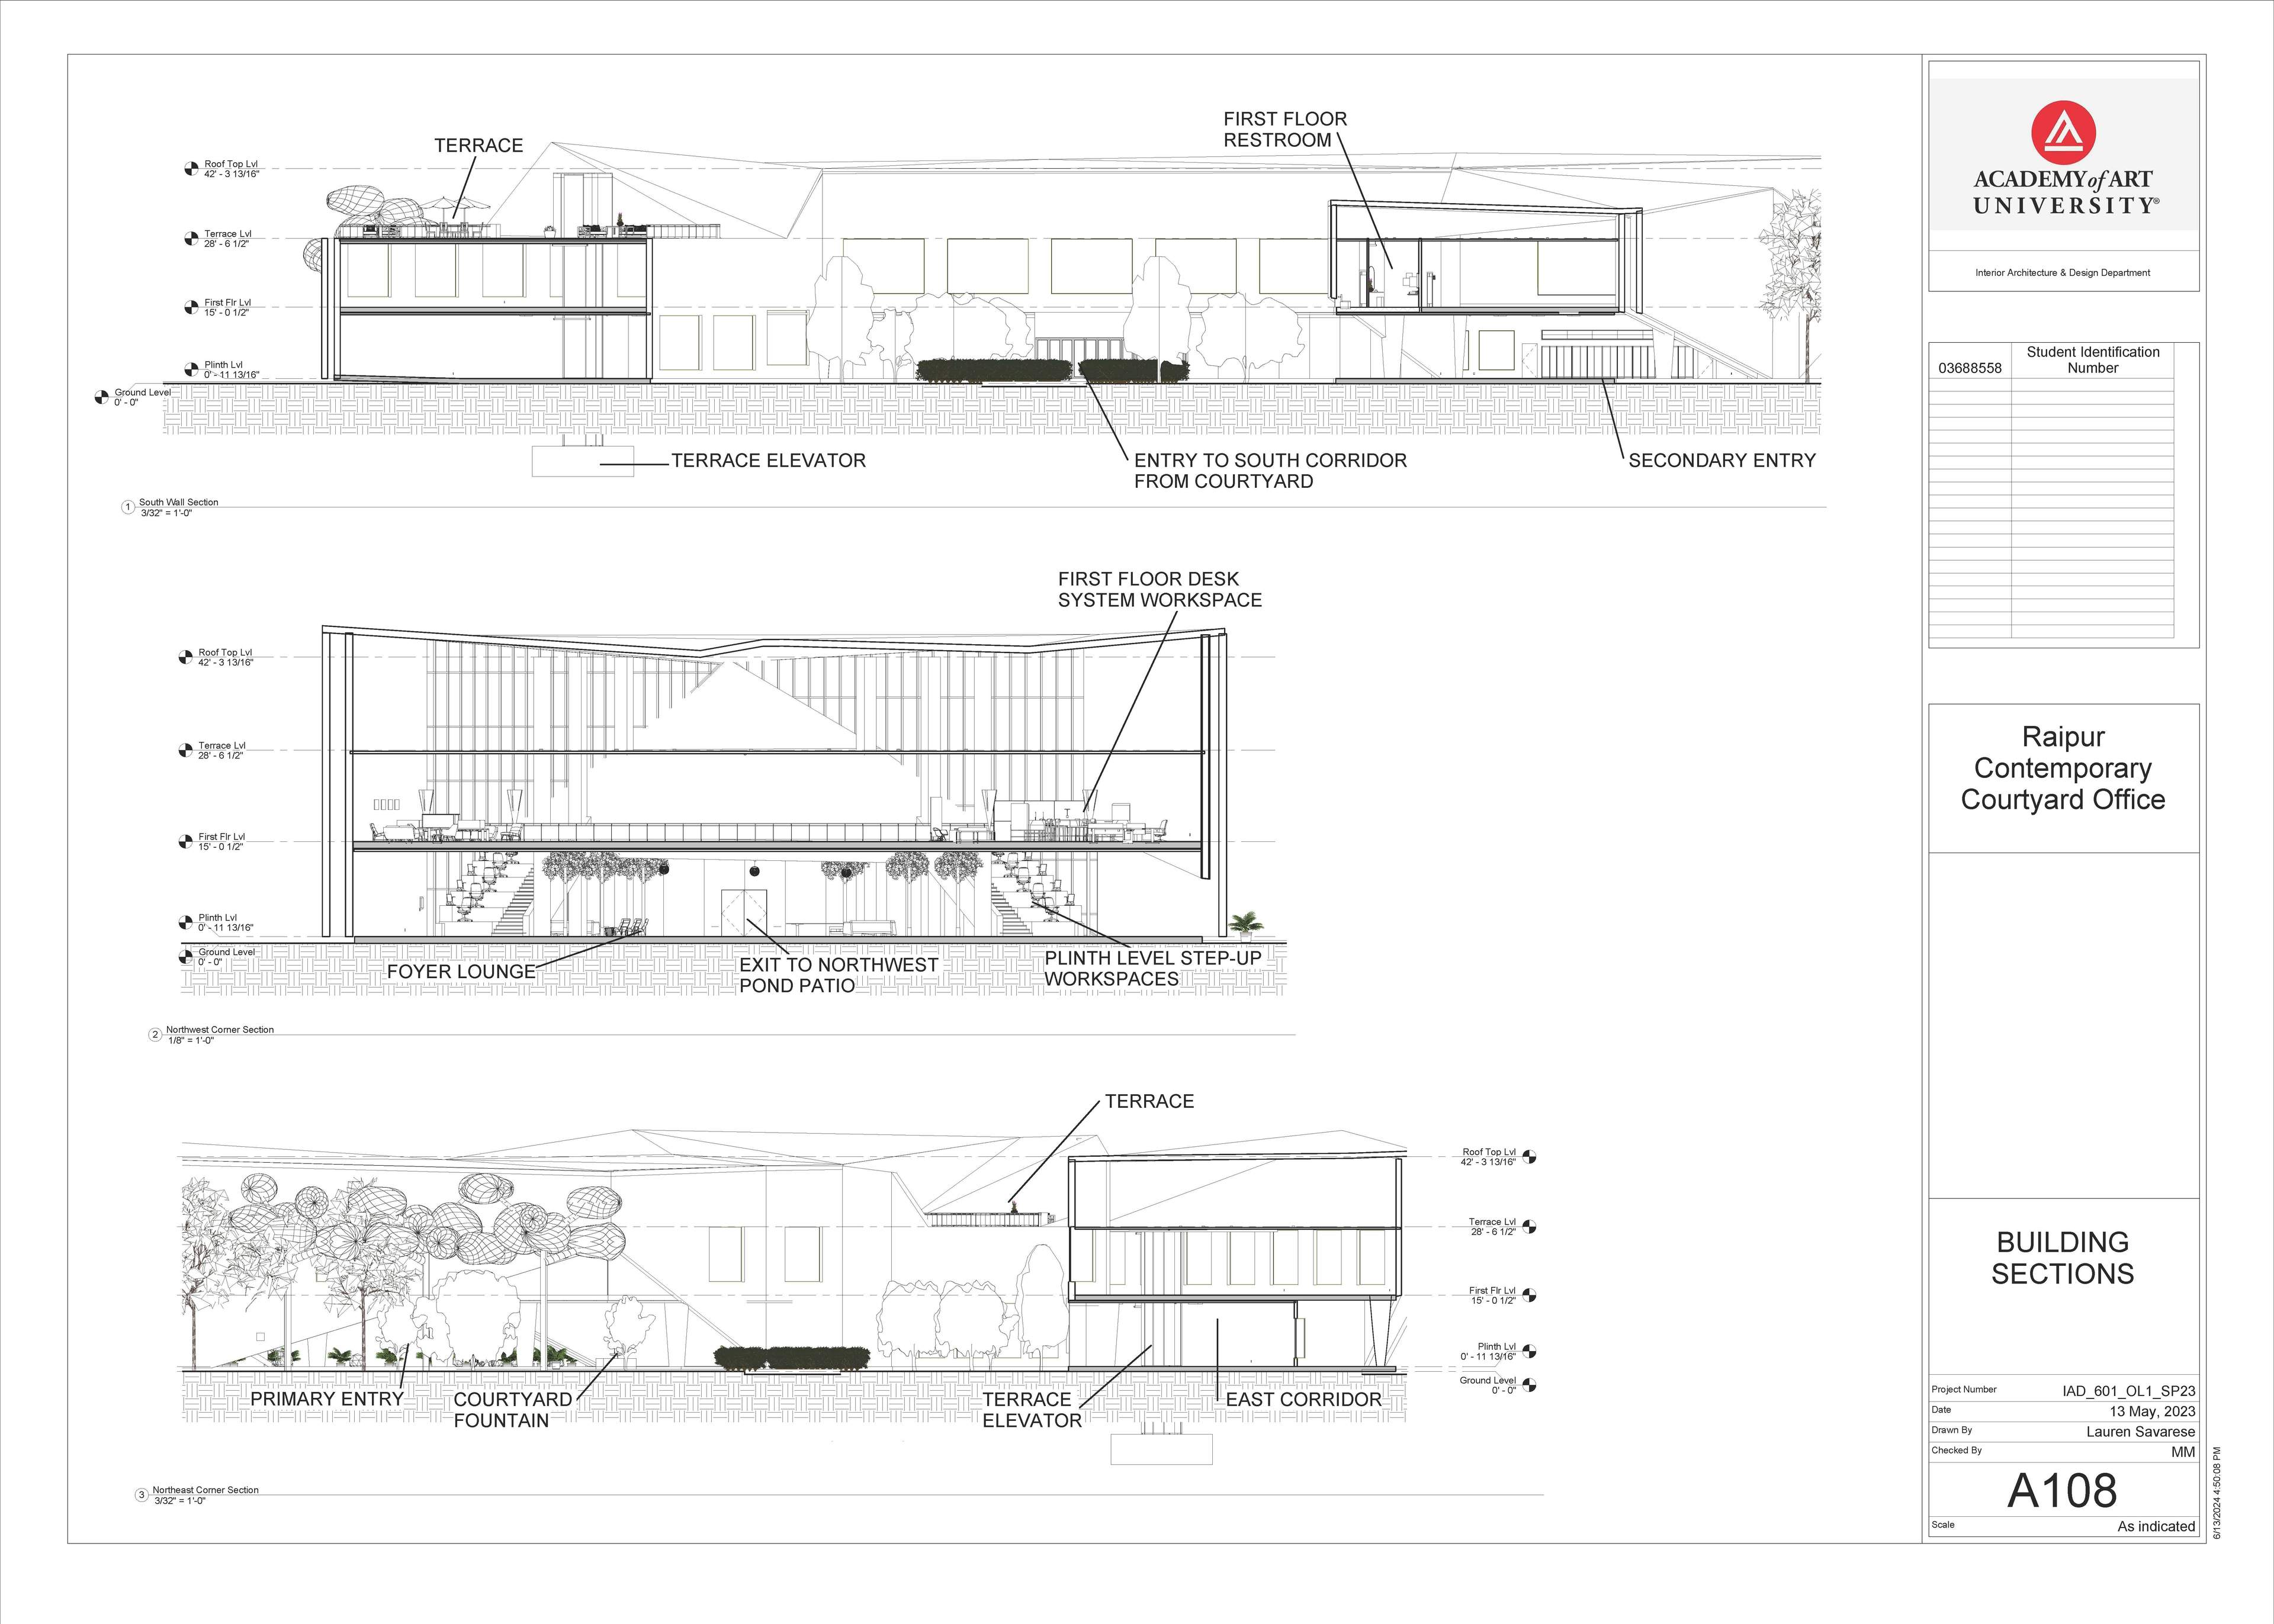
- Building Sections
- Door and Window Schedule
- Presentation-style floor plans, elevations and sections
- Solar Study
- Renders
My project is made up of 3 levels: Plinth, First Floor, and Terrace. Scale of drawings is noted at bottom right of each sheet.
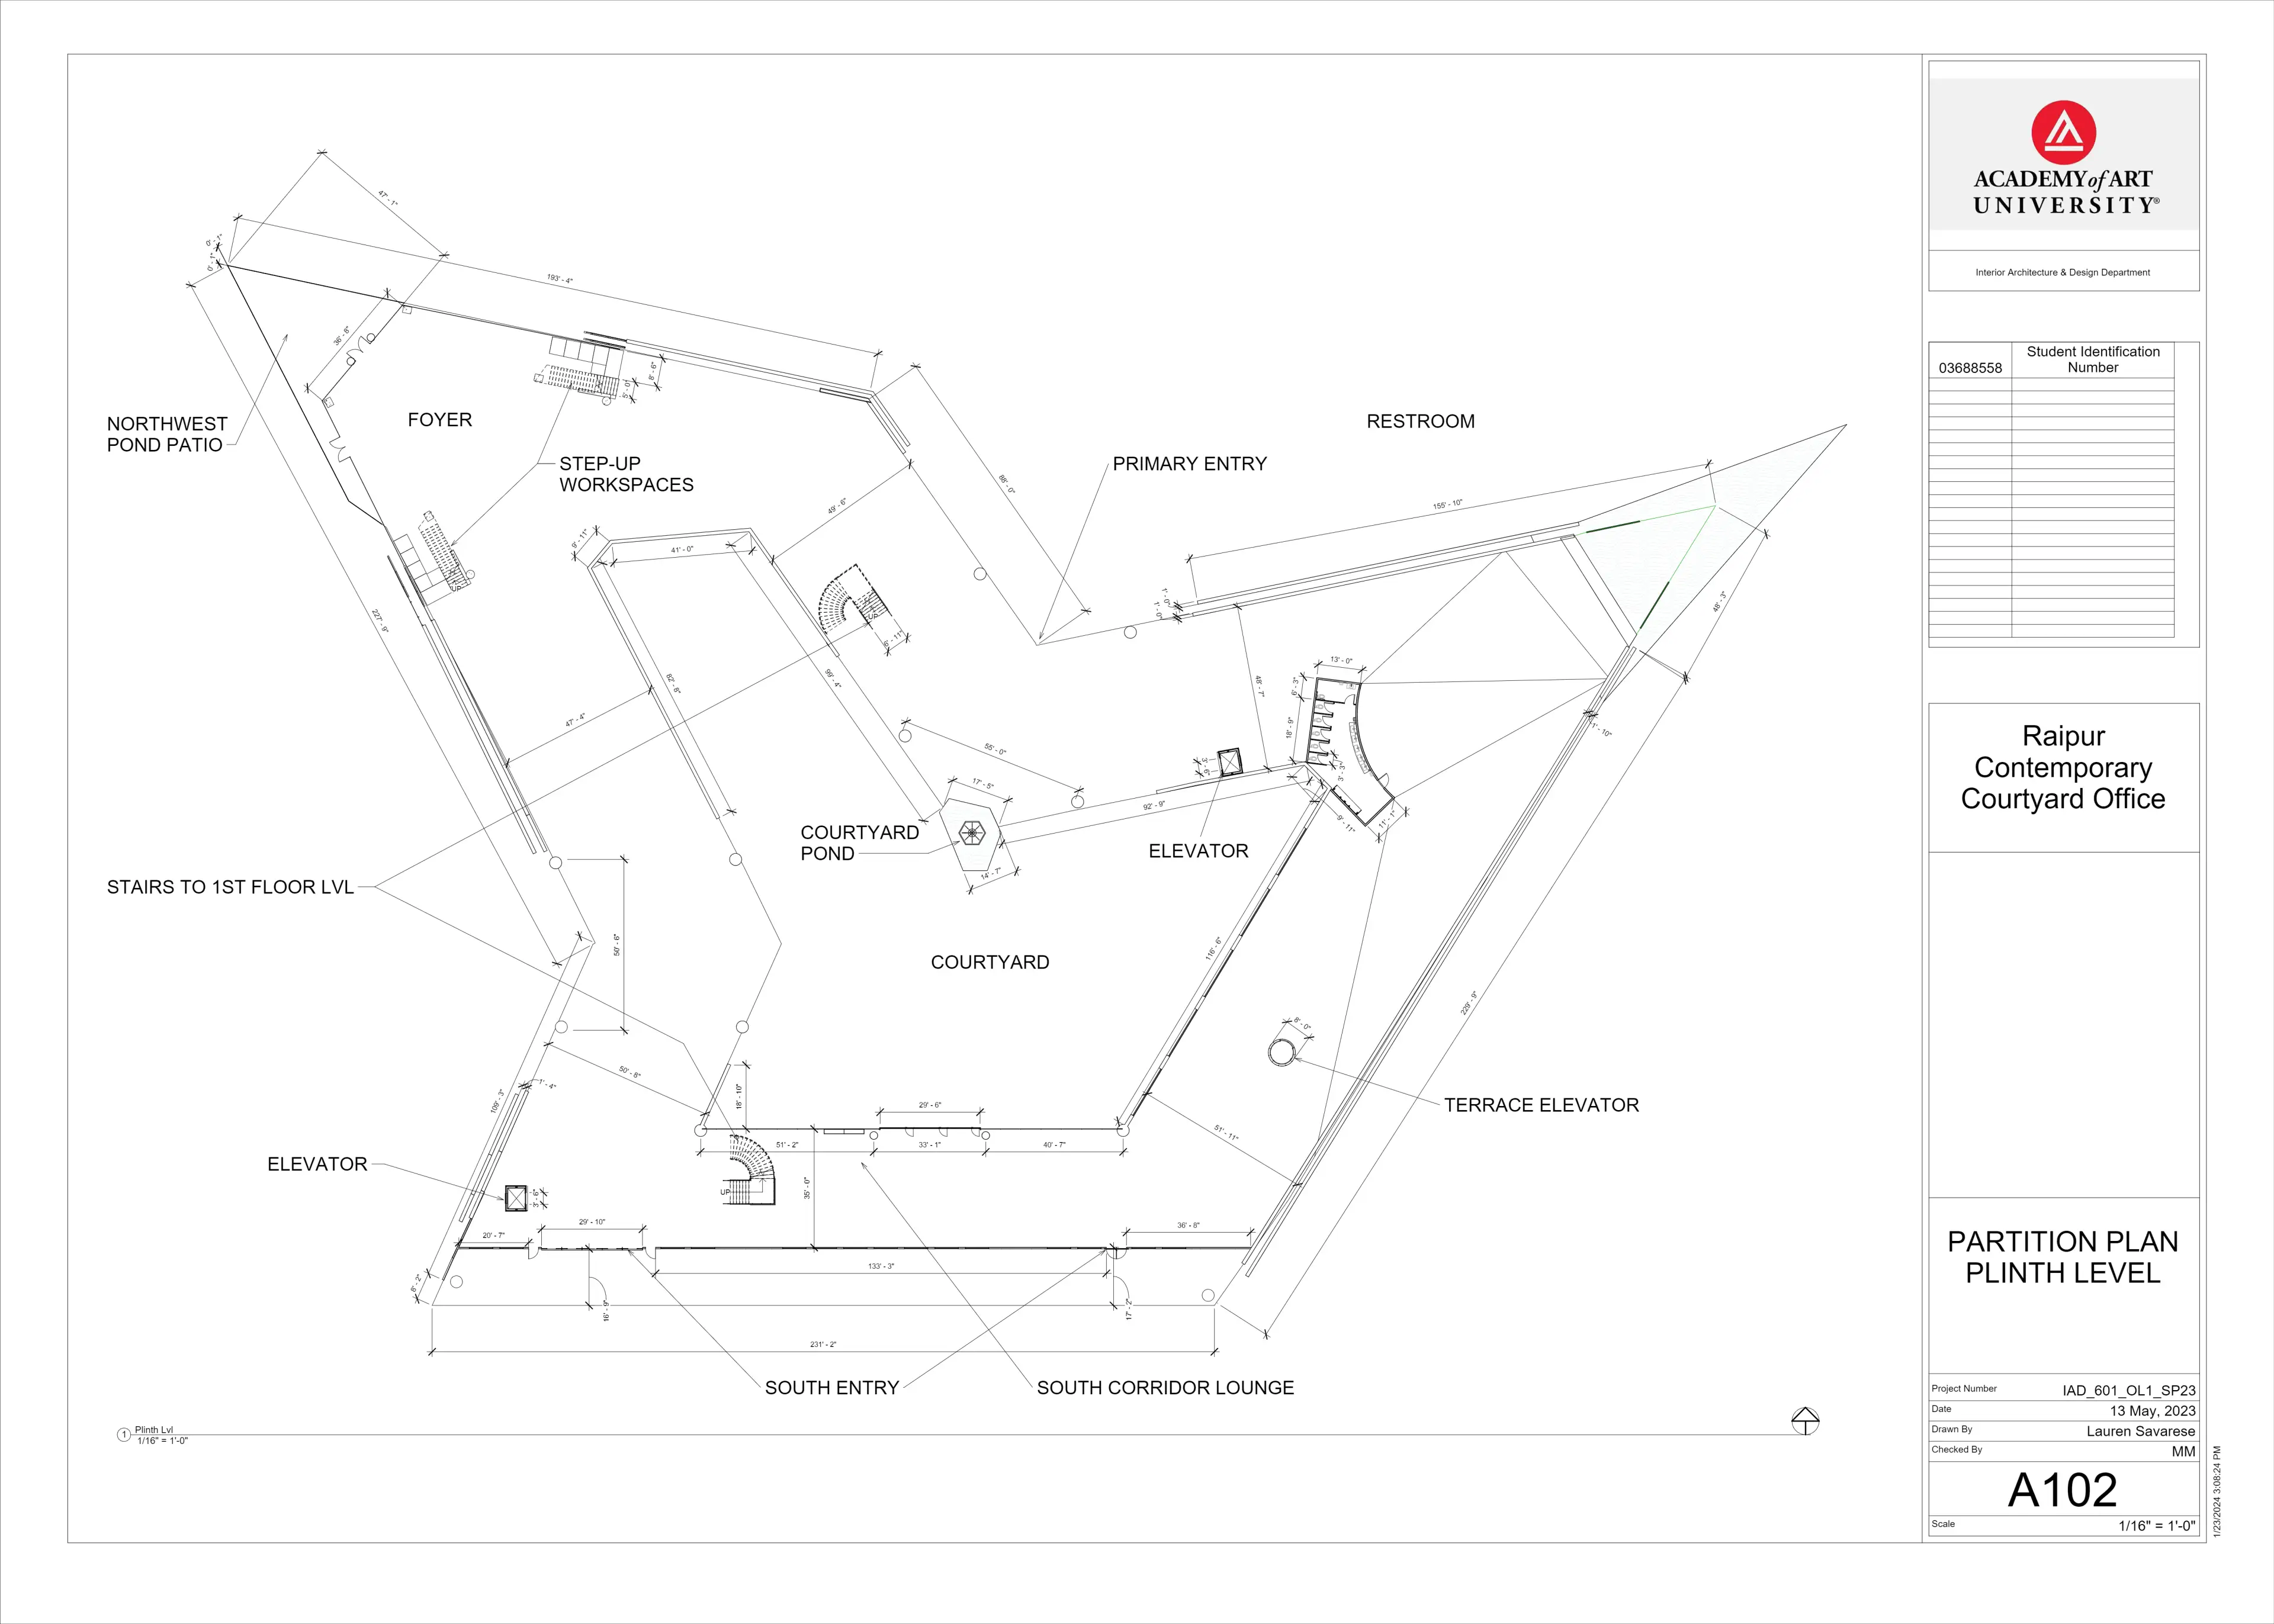
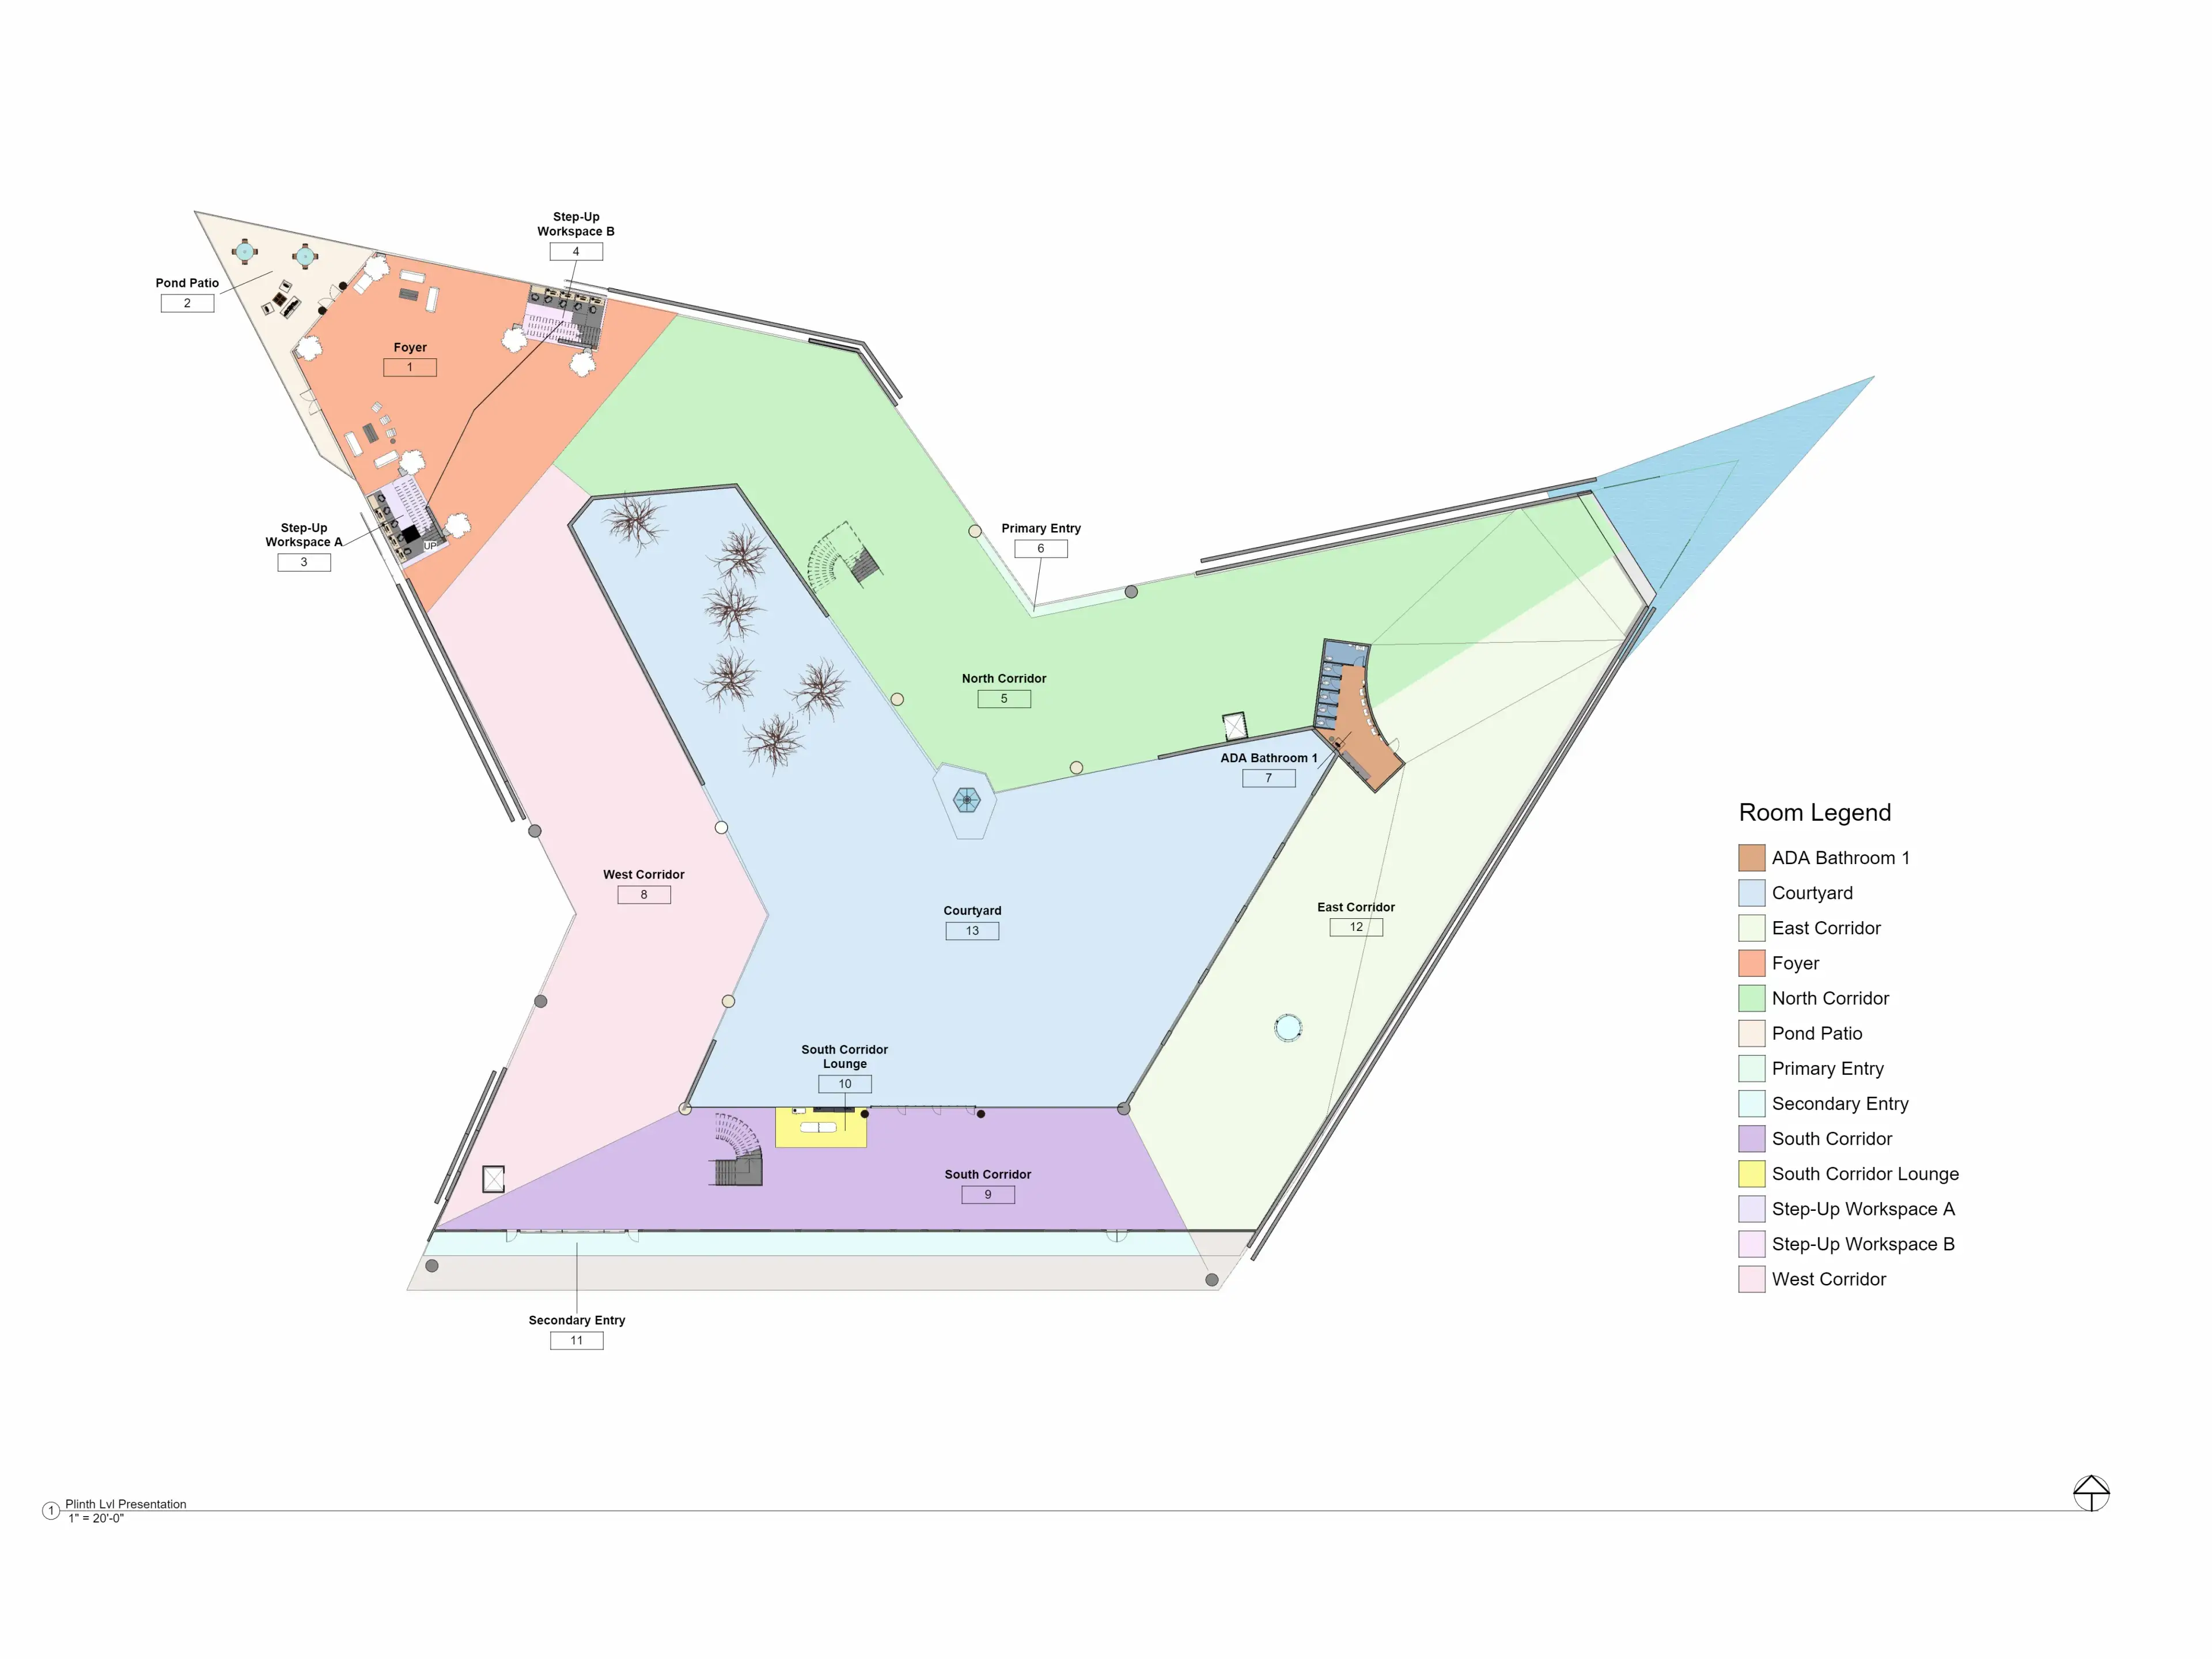
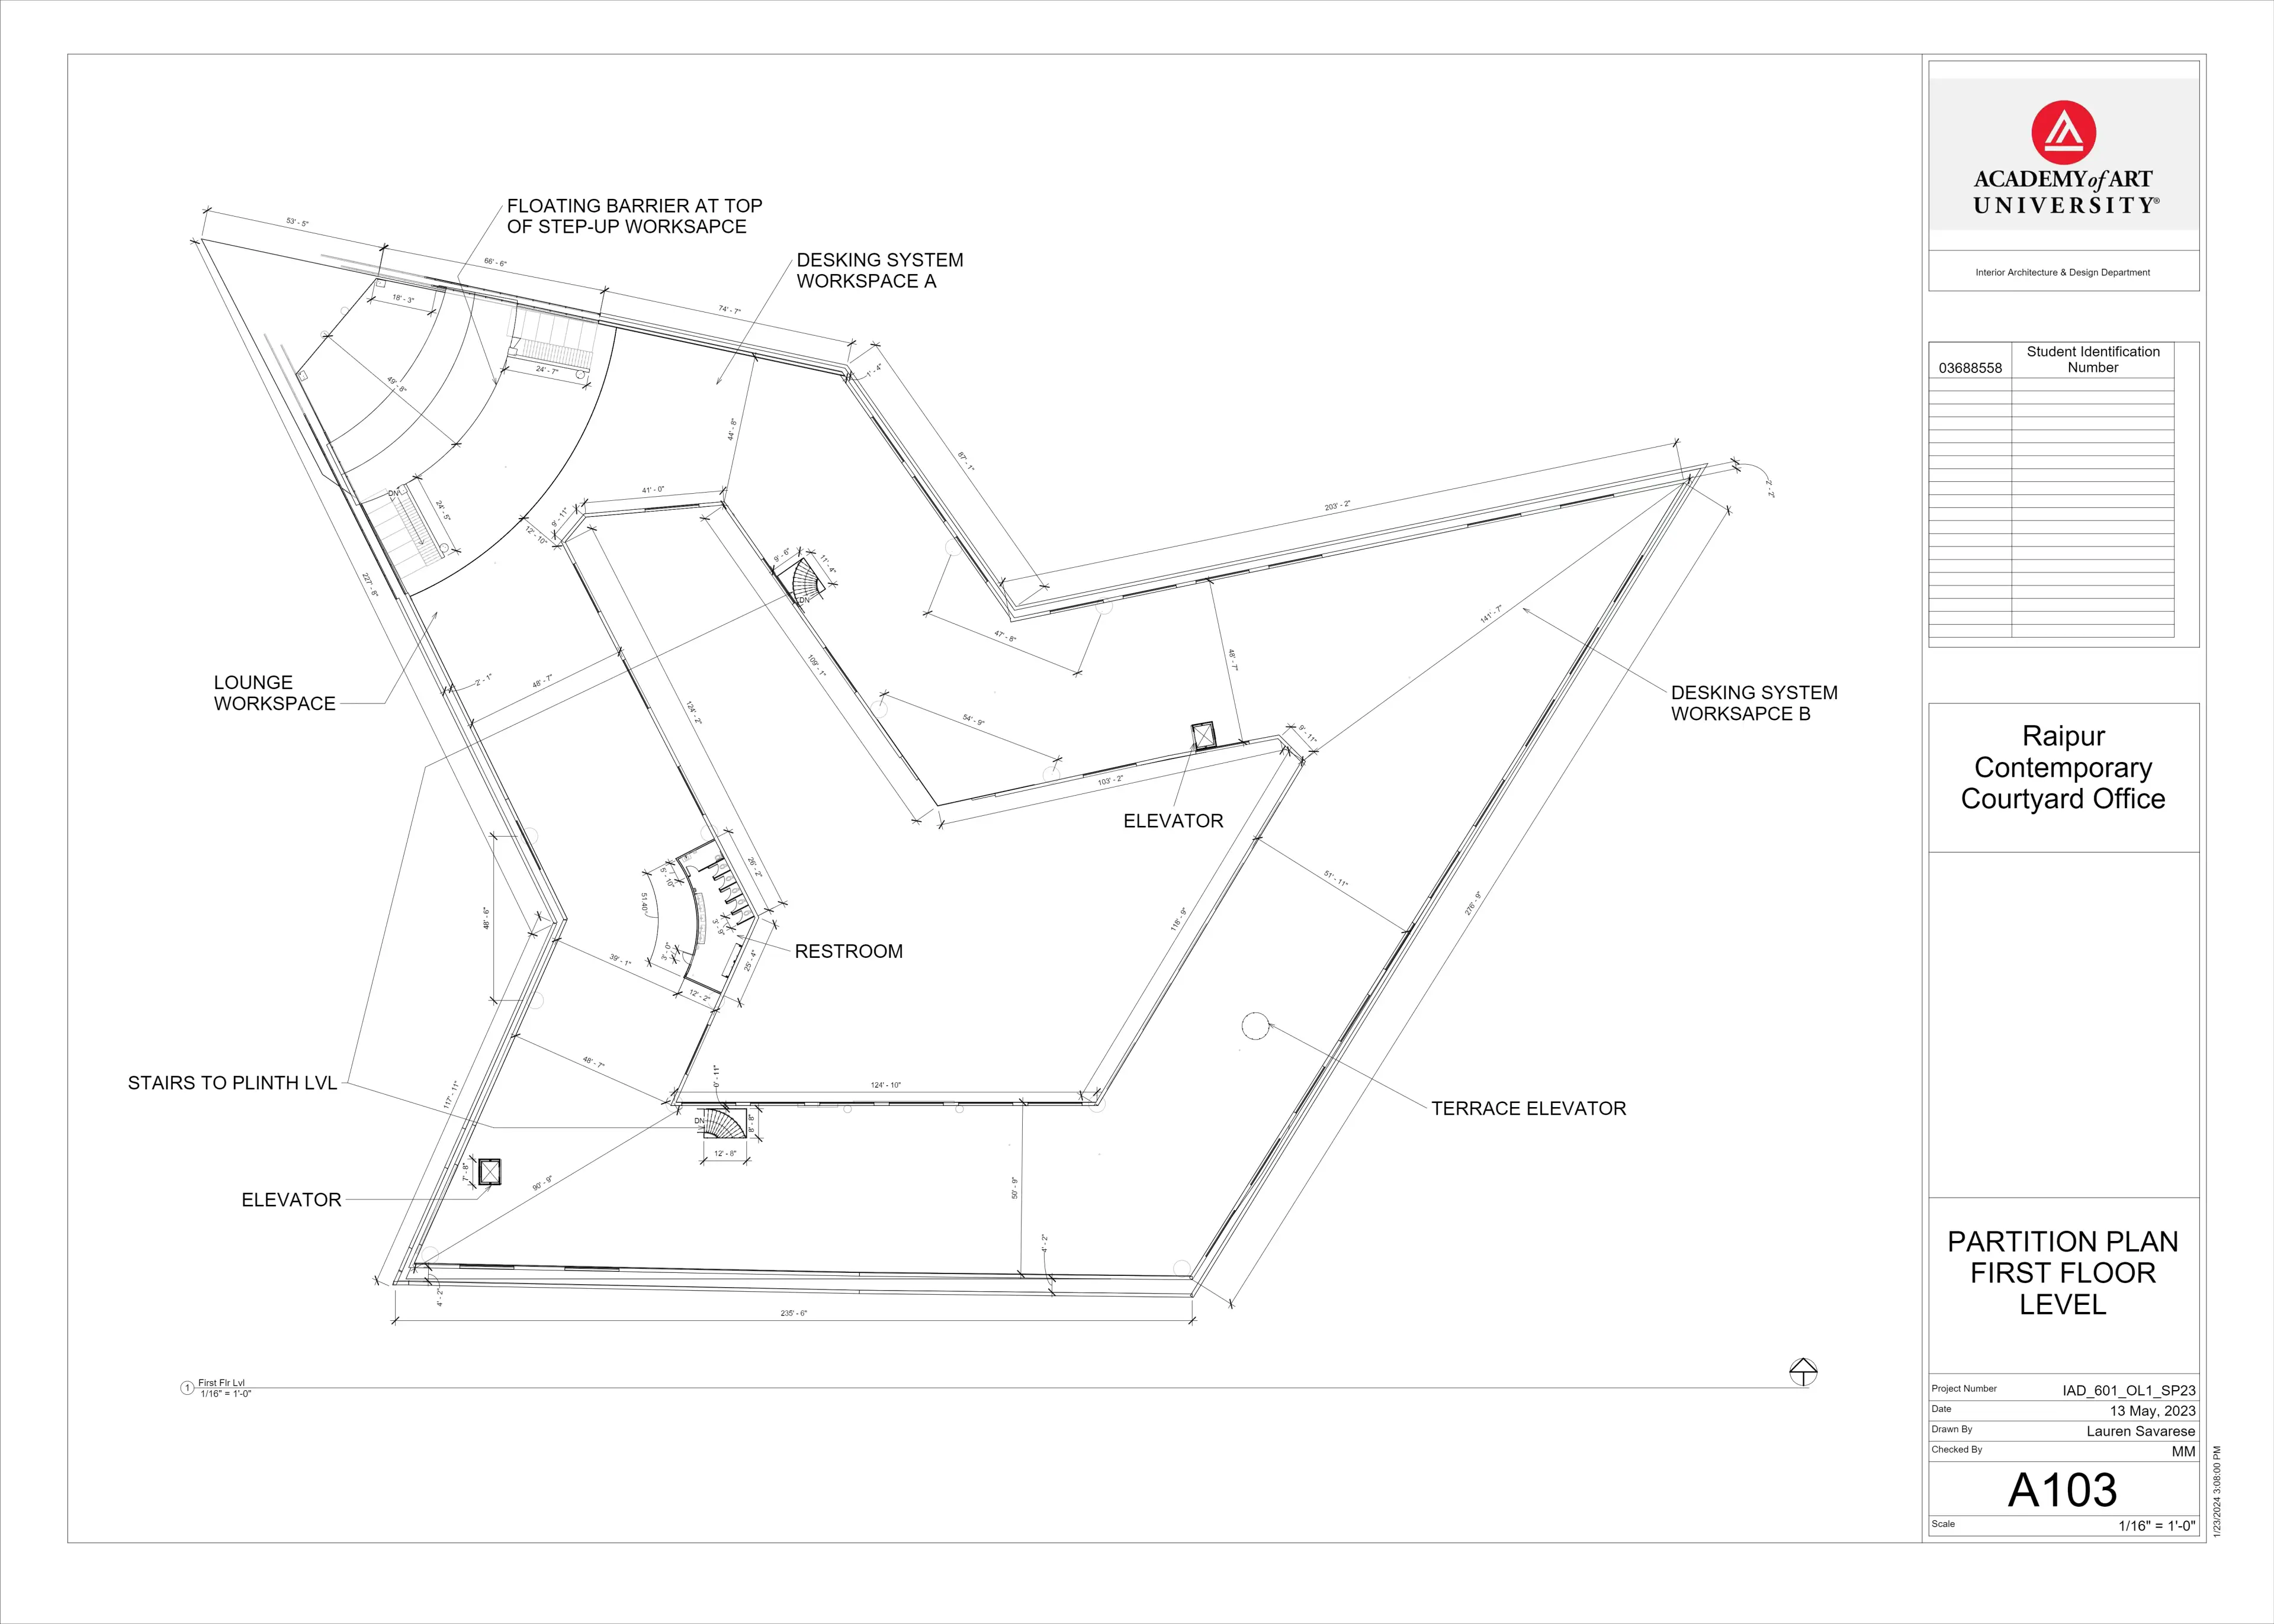
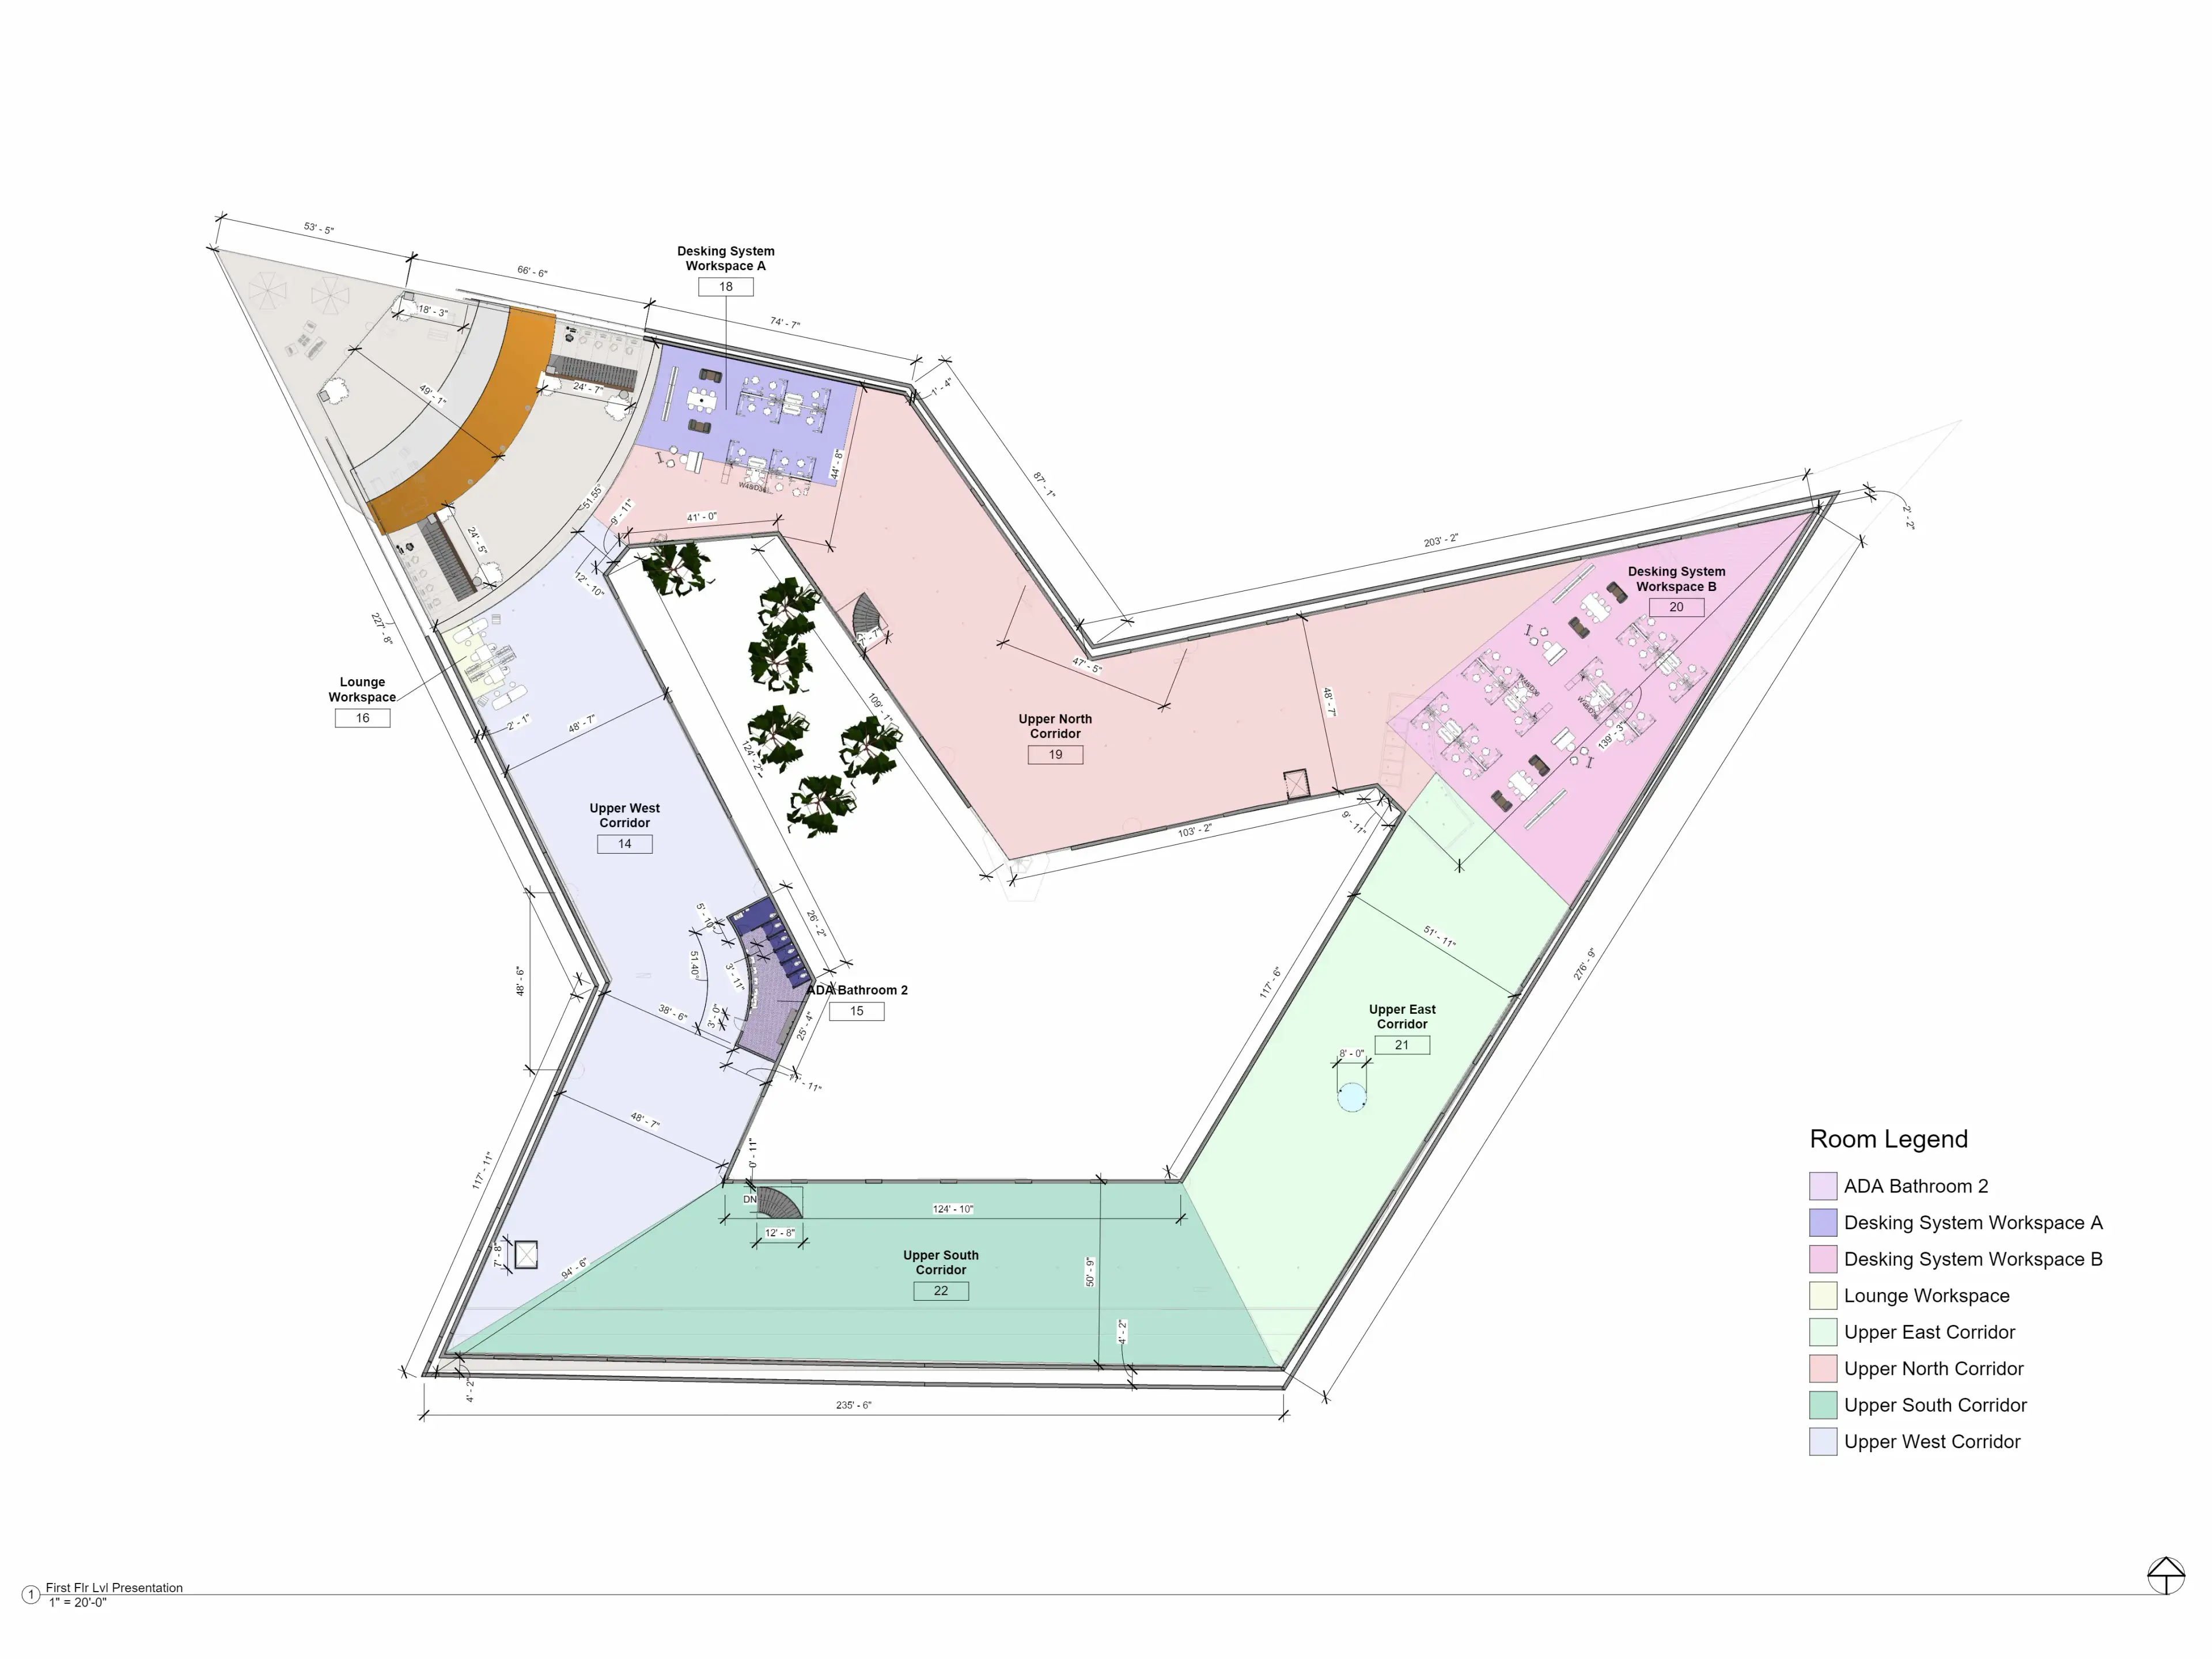
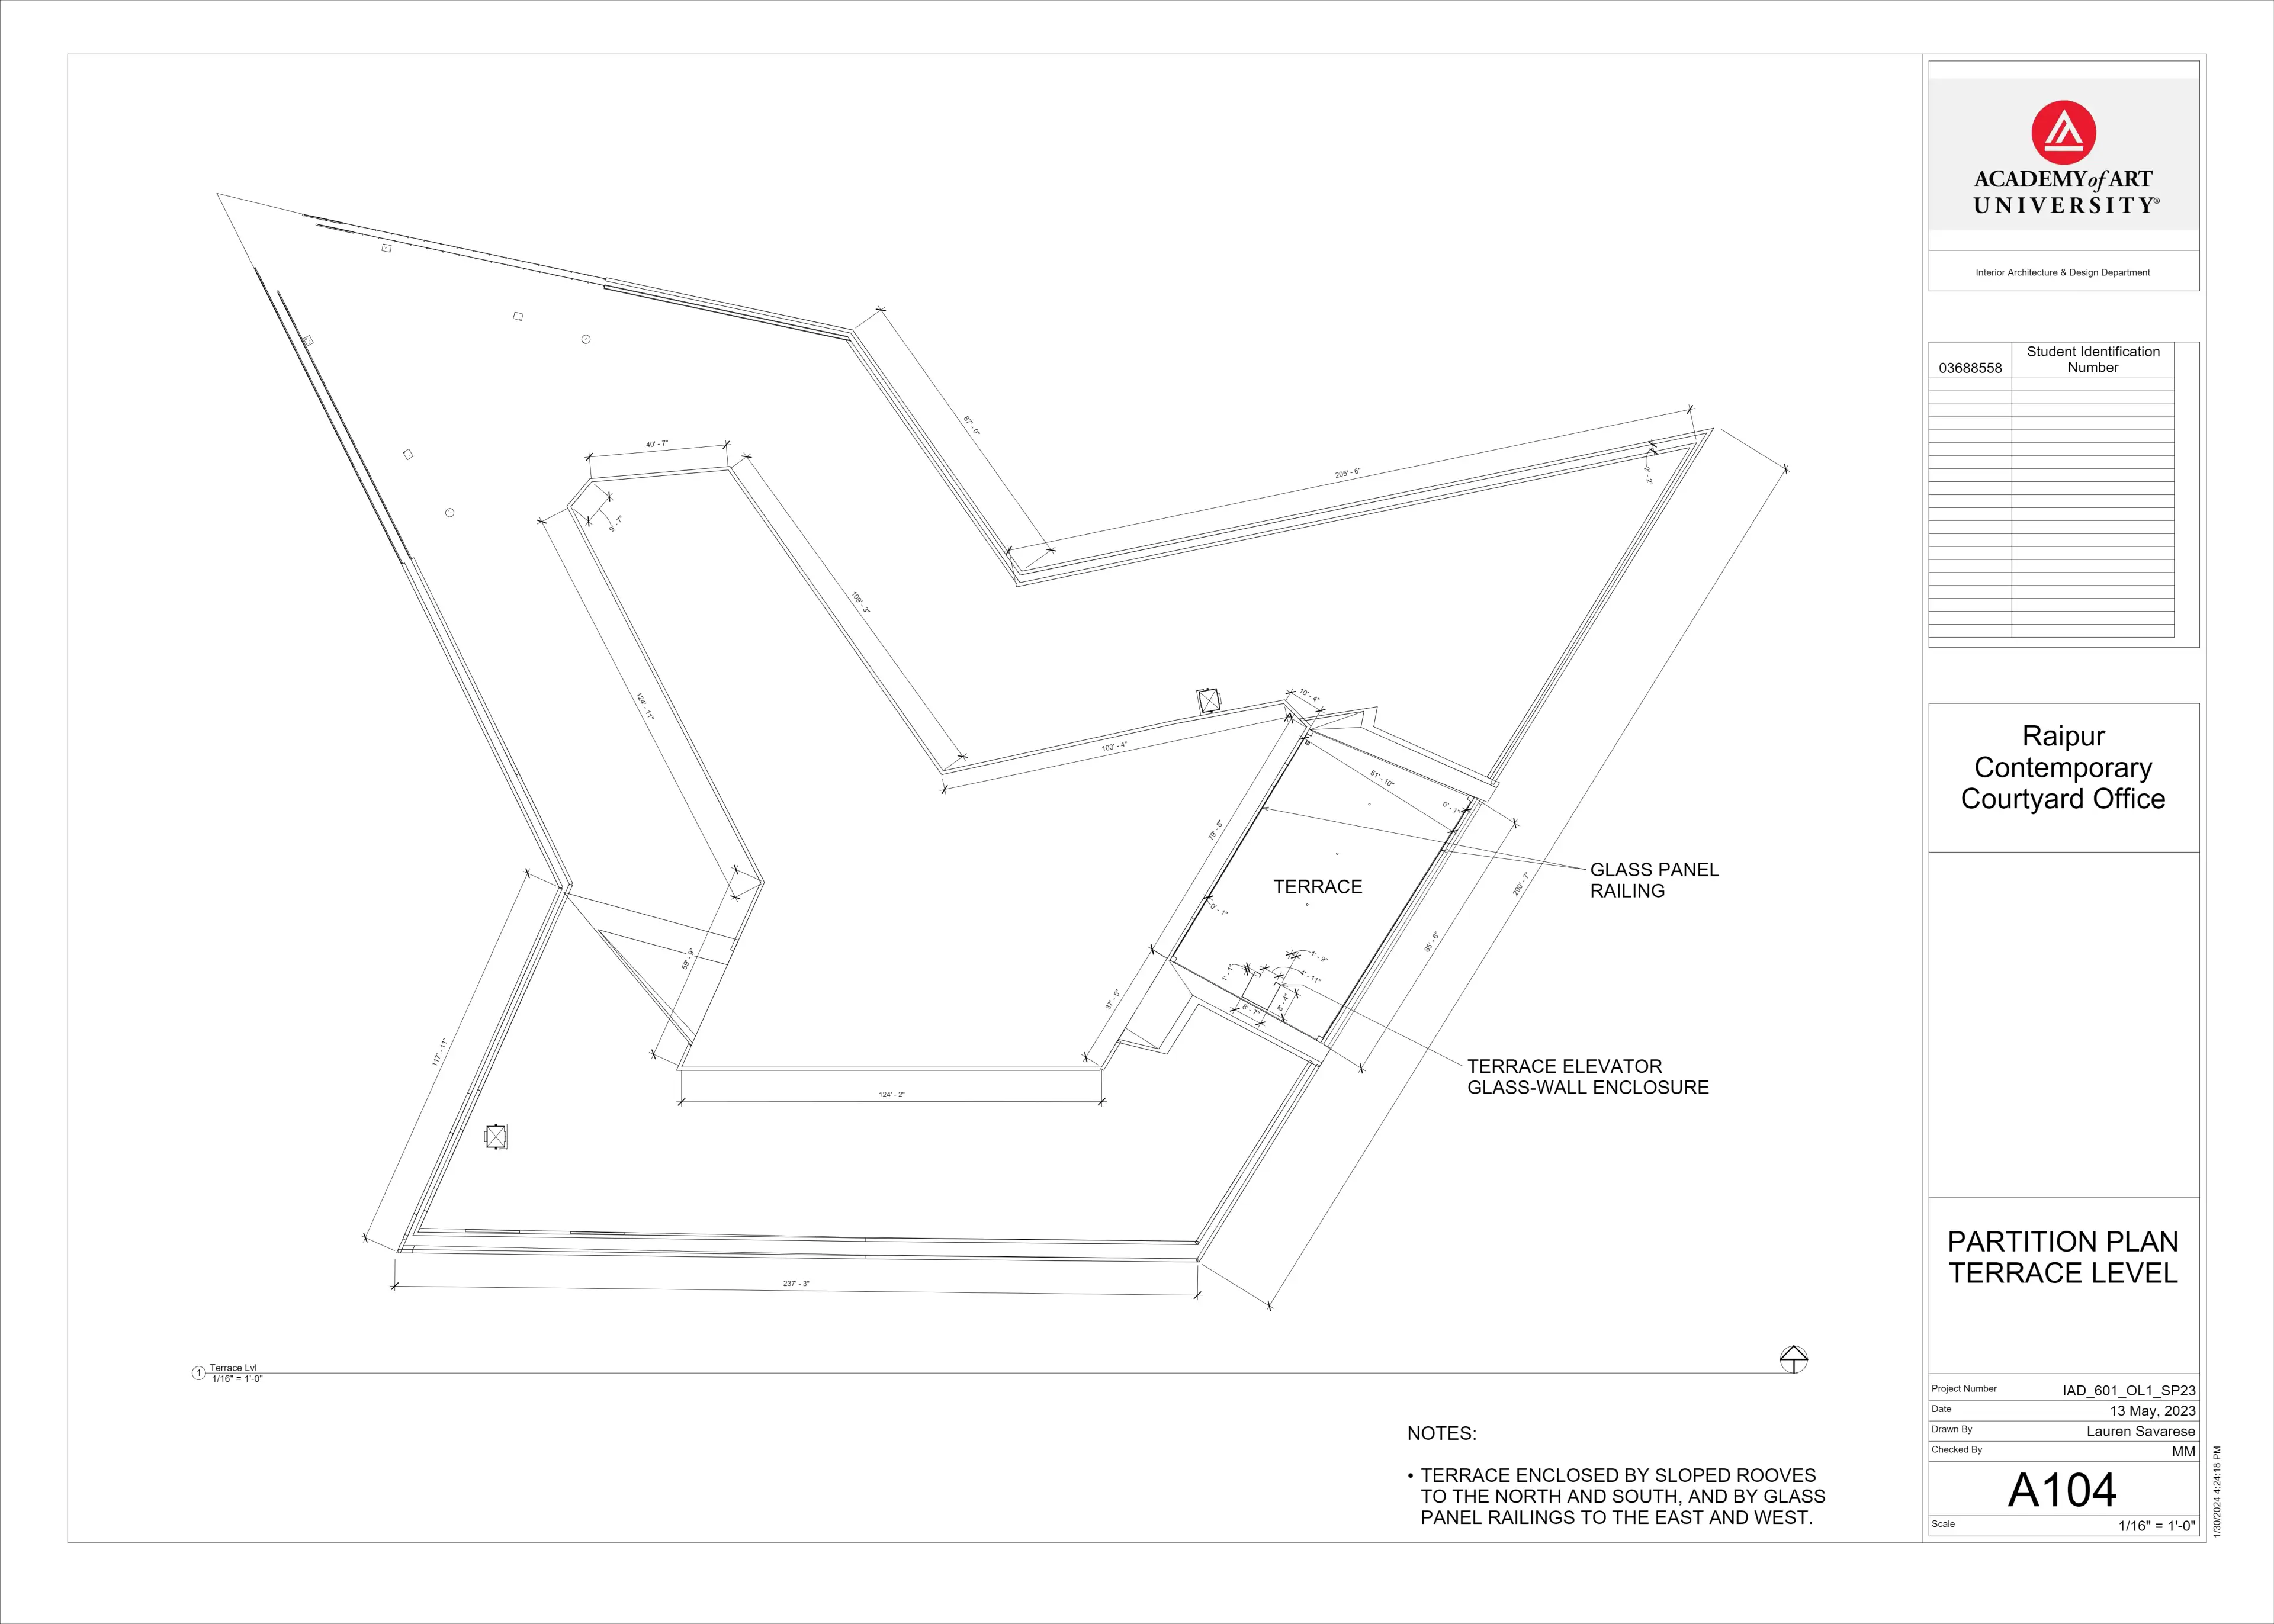
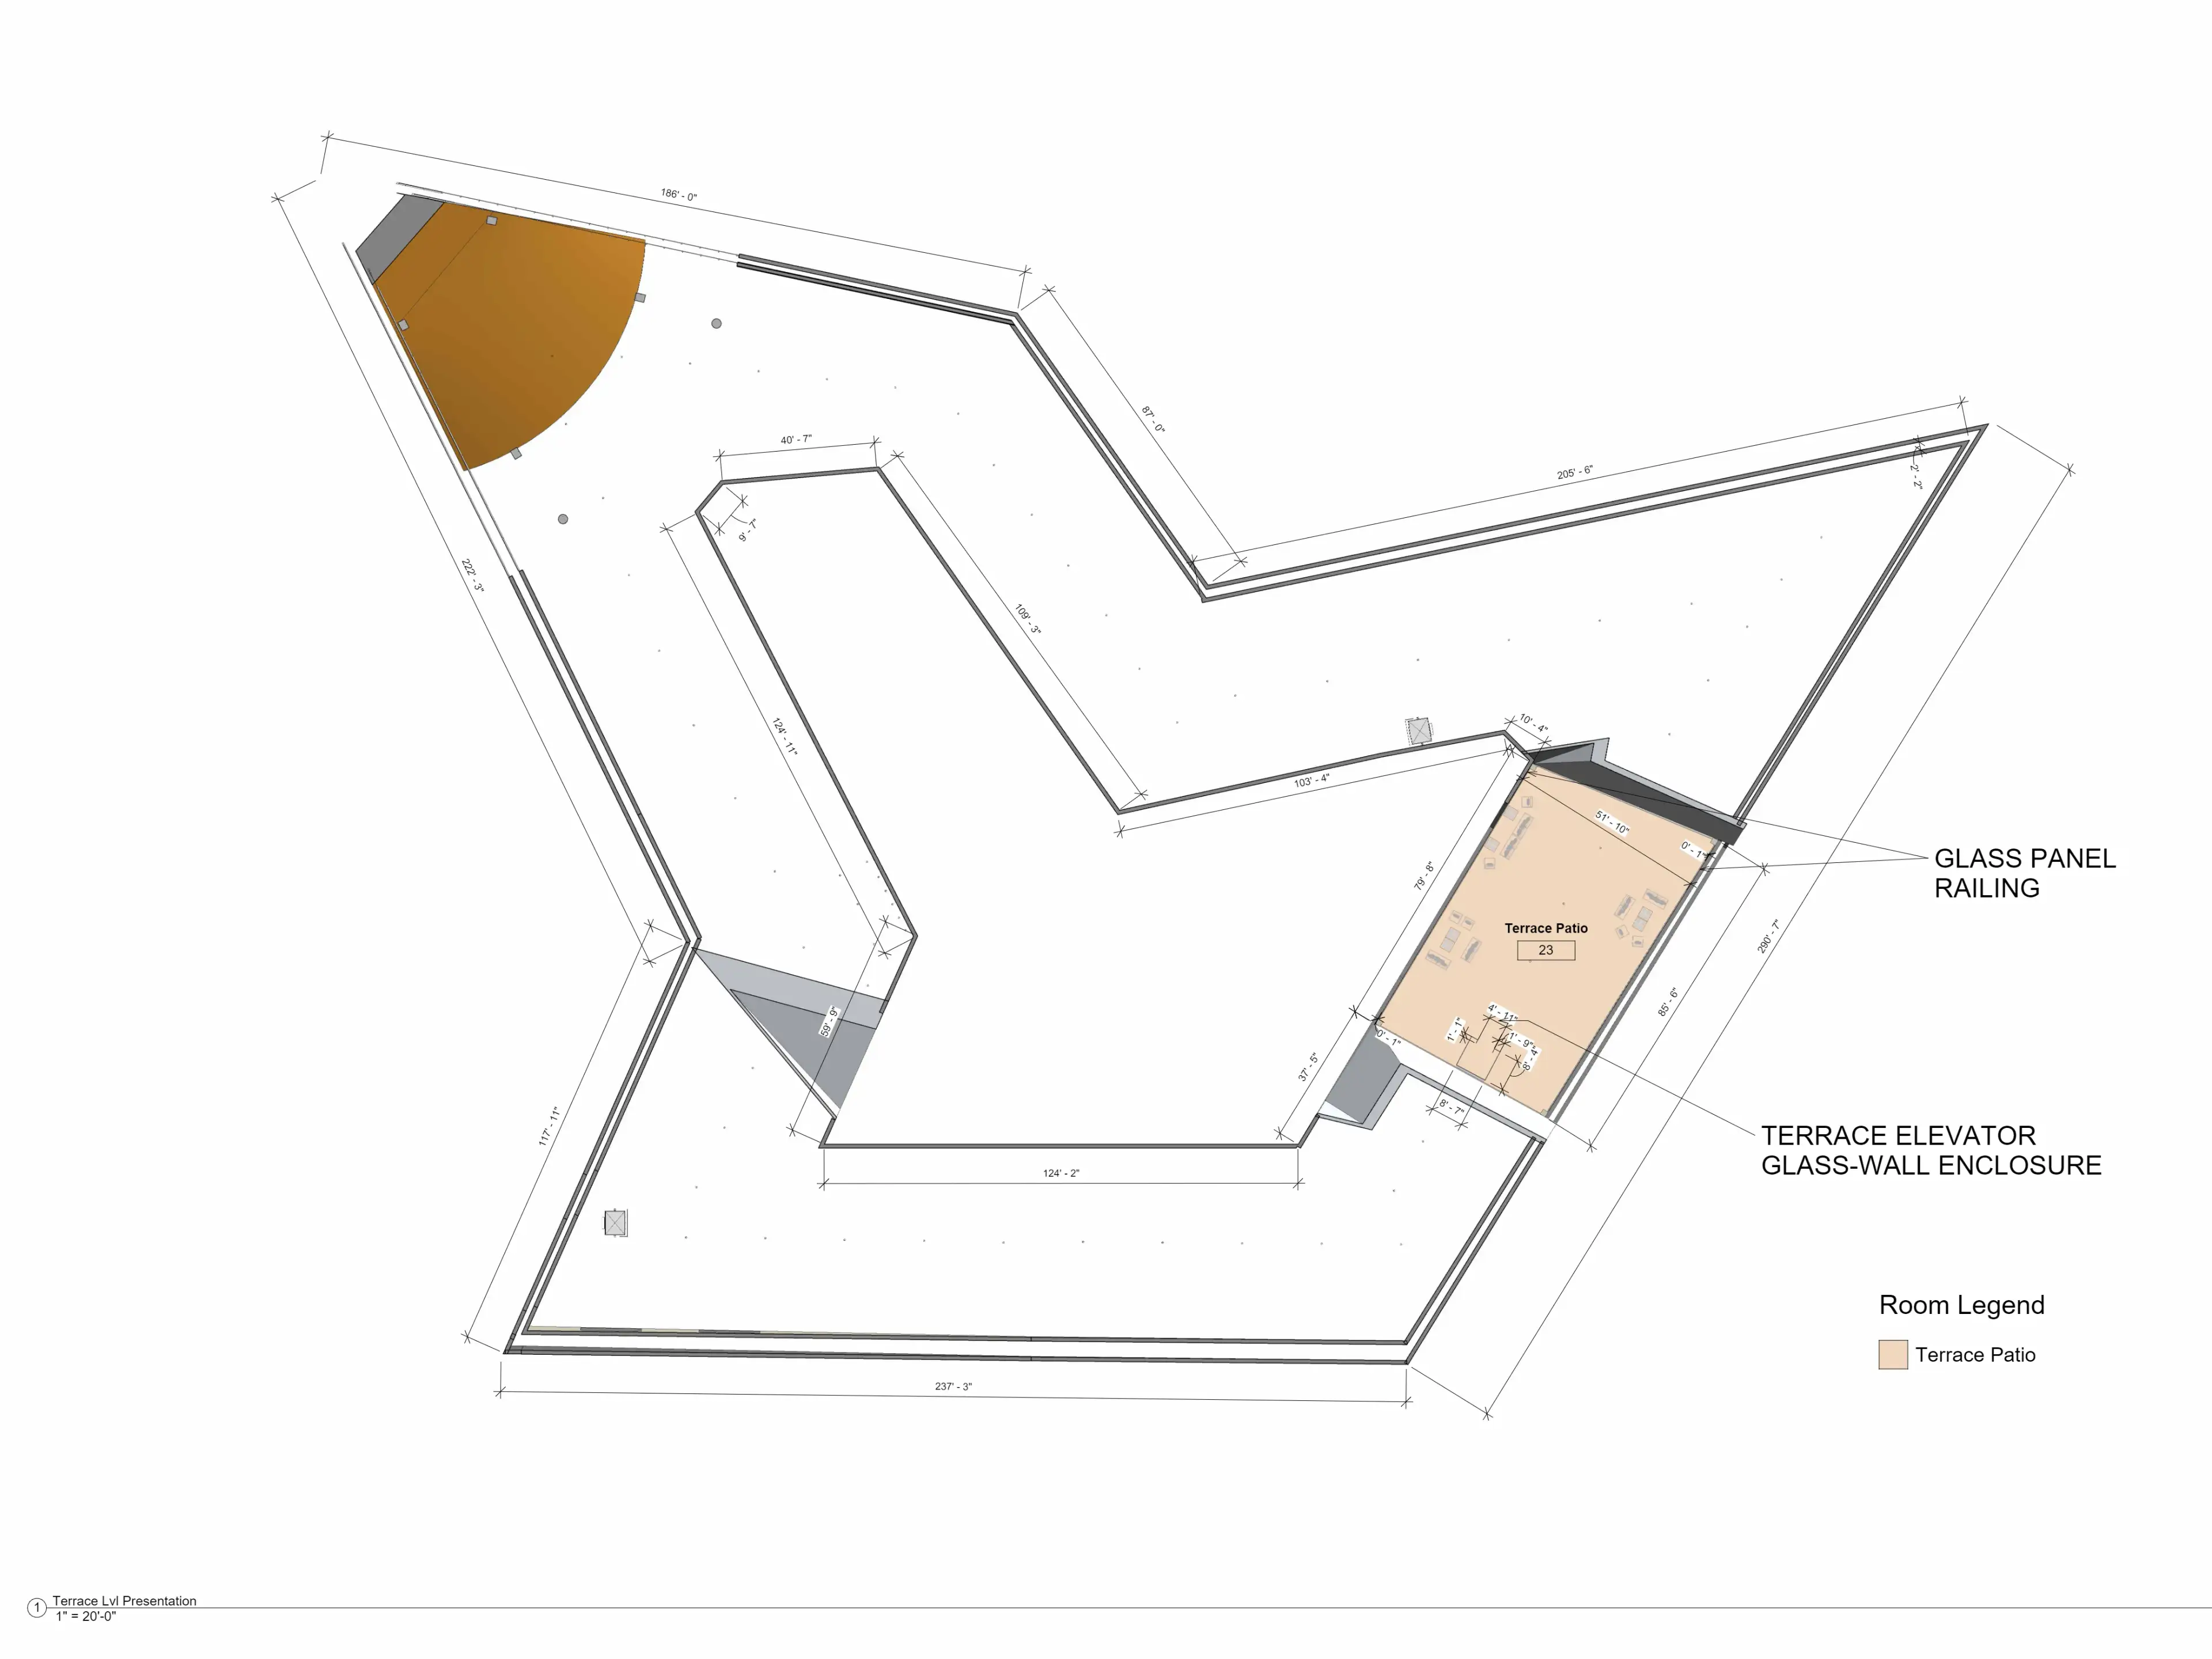
Partition Plans
The partition plan shows the location and dimensions of all walls (exterior and interior) on the respective level. Below are the partition plans in both plan and presentation format.
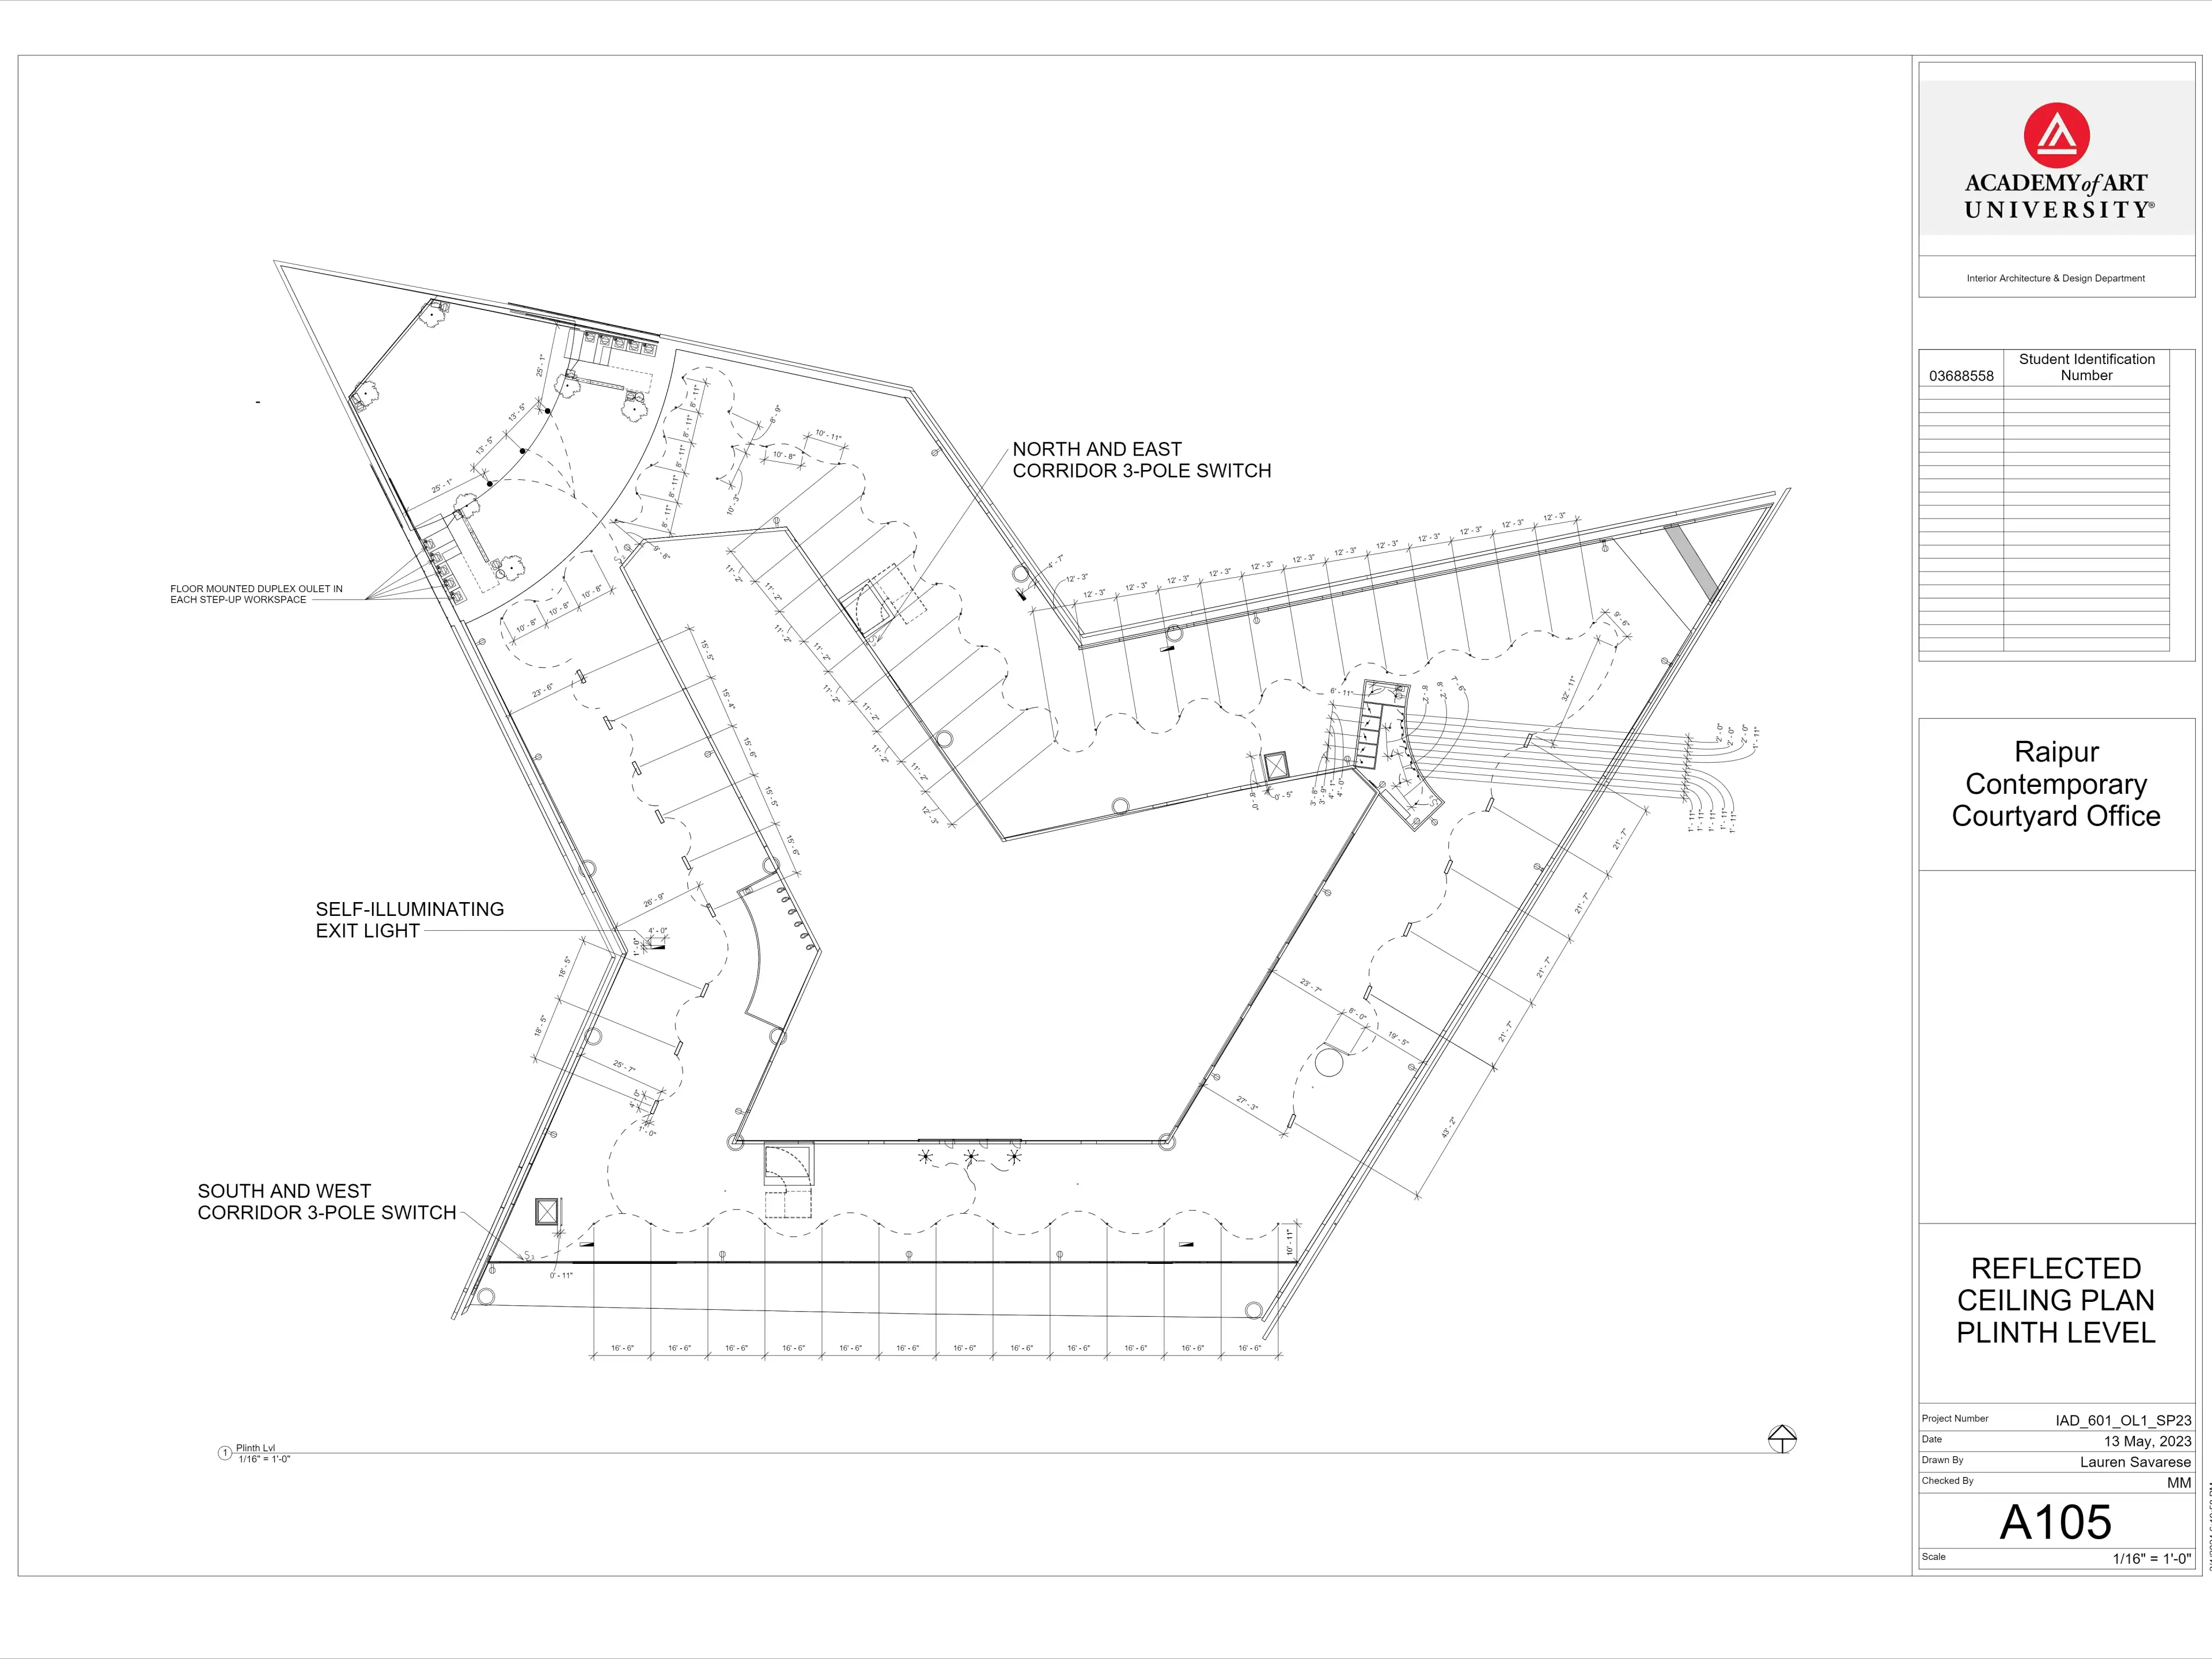
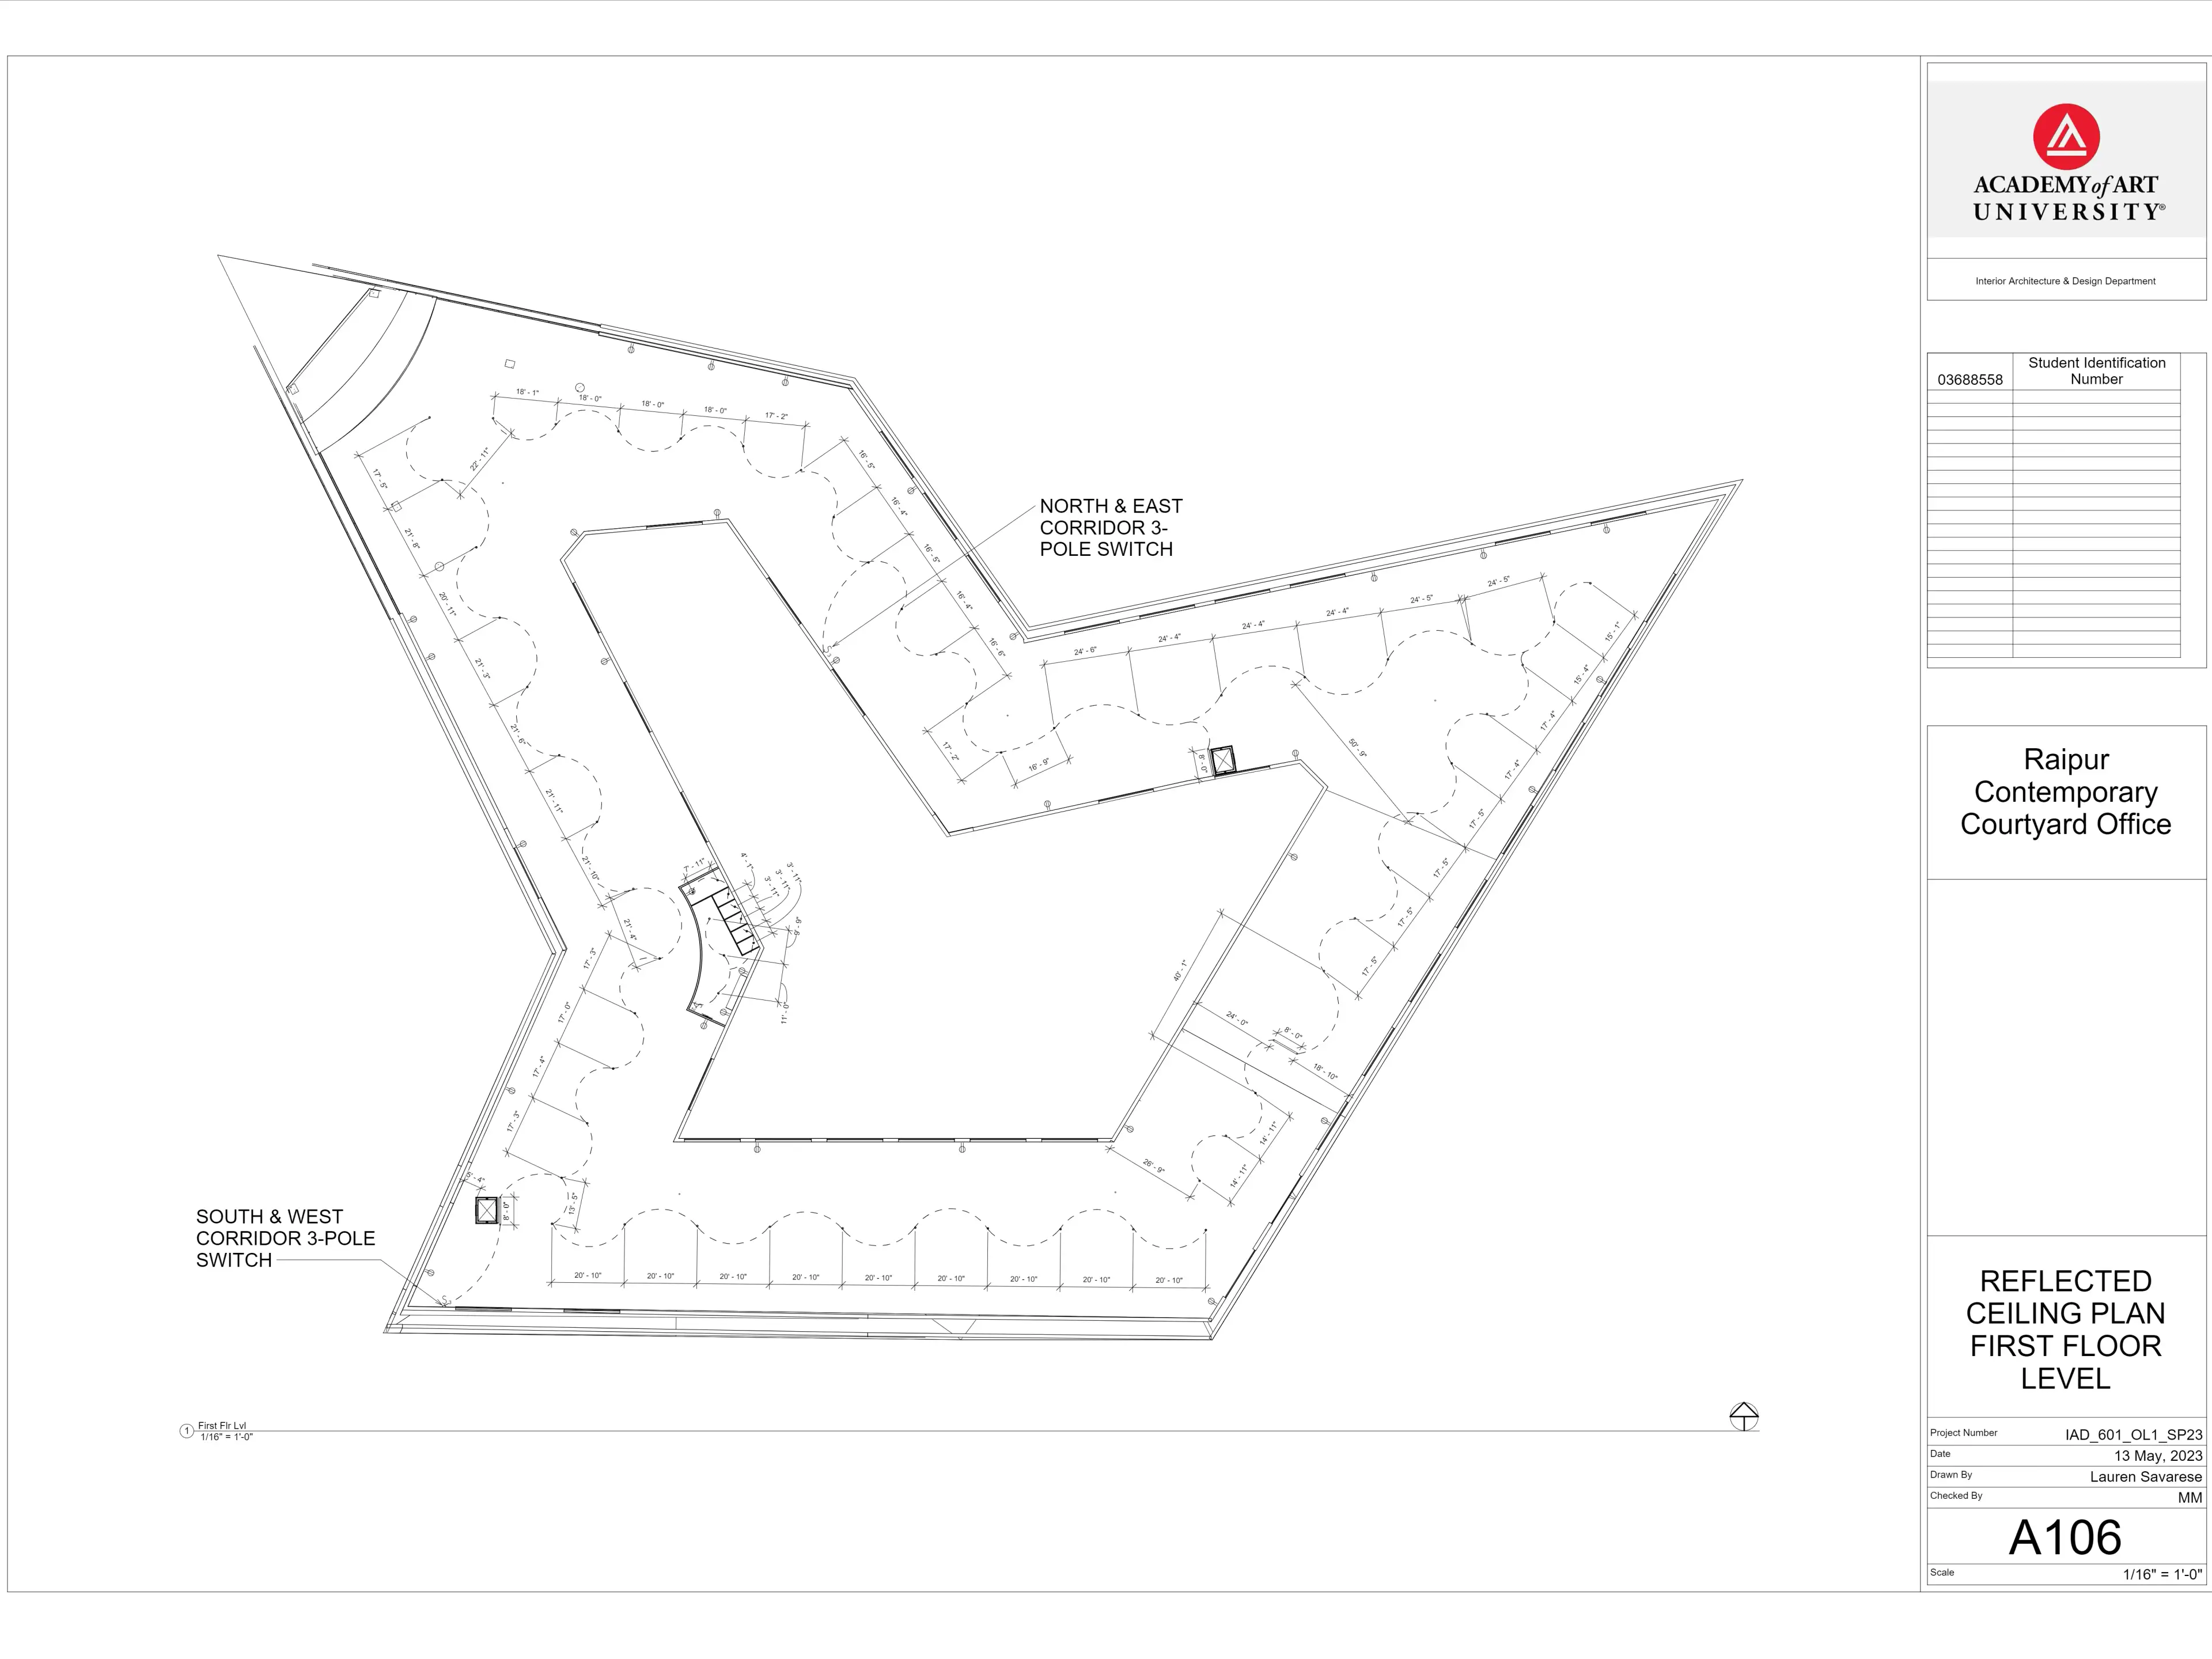
Reflected Ceiling Plans
These reflected ceiling plans show the placement of various light fixtures within each level's ceiling, as well as the switching intent for the fixtures. Curved dashed lines mark connected circuits.
Building Sections &
Interior Elevations
These exterior sections show the building from each direction, and mark where each level cuts through the interior.
Following are interior/exterior building sections as well as interior elevations that showcase the FF&E selections for the respective spaces. Important dimensions of fixtures within the elevation are included.
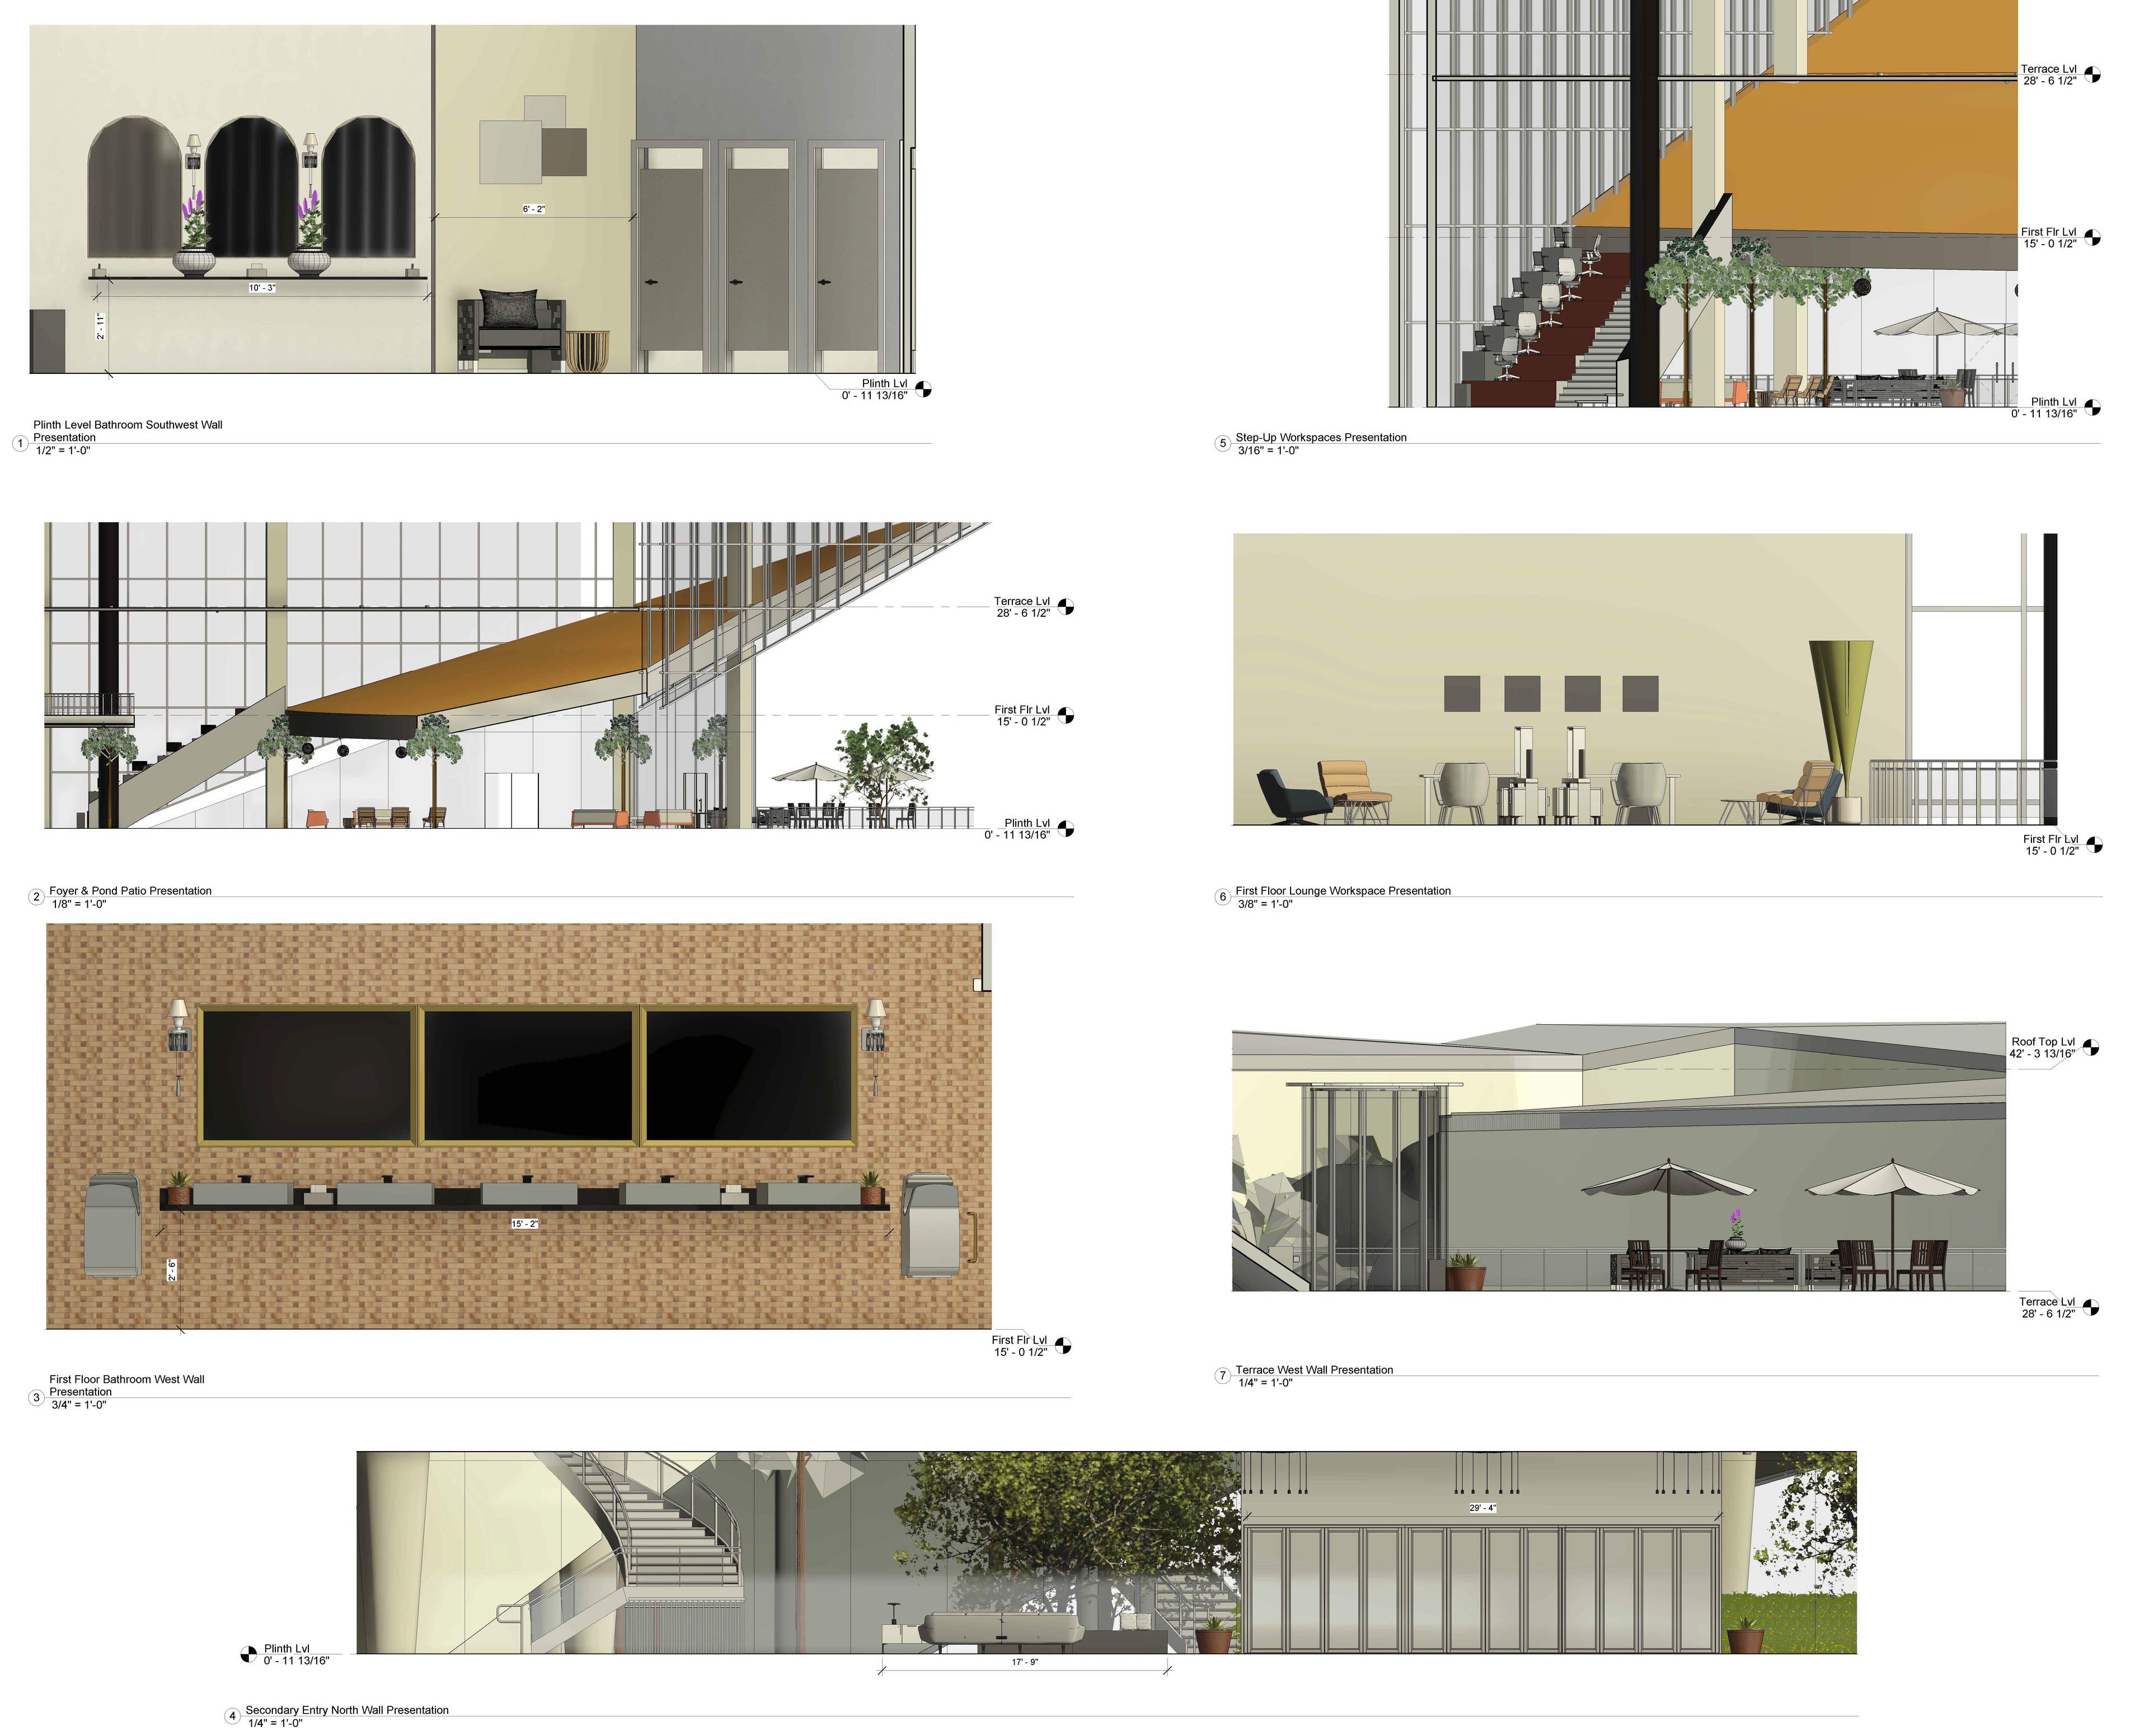
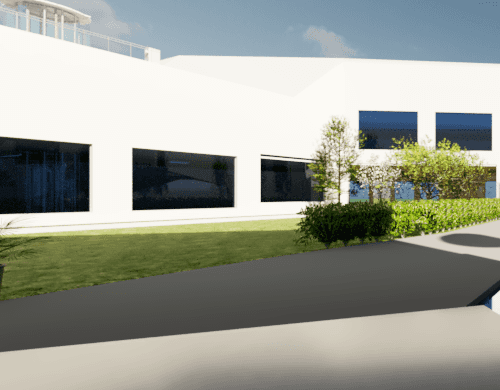
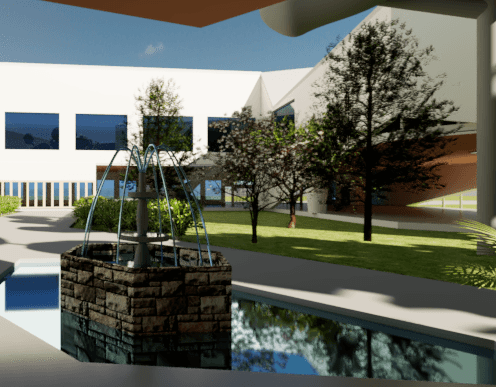
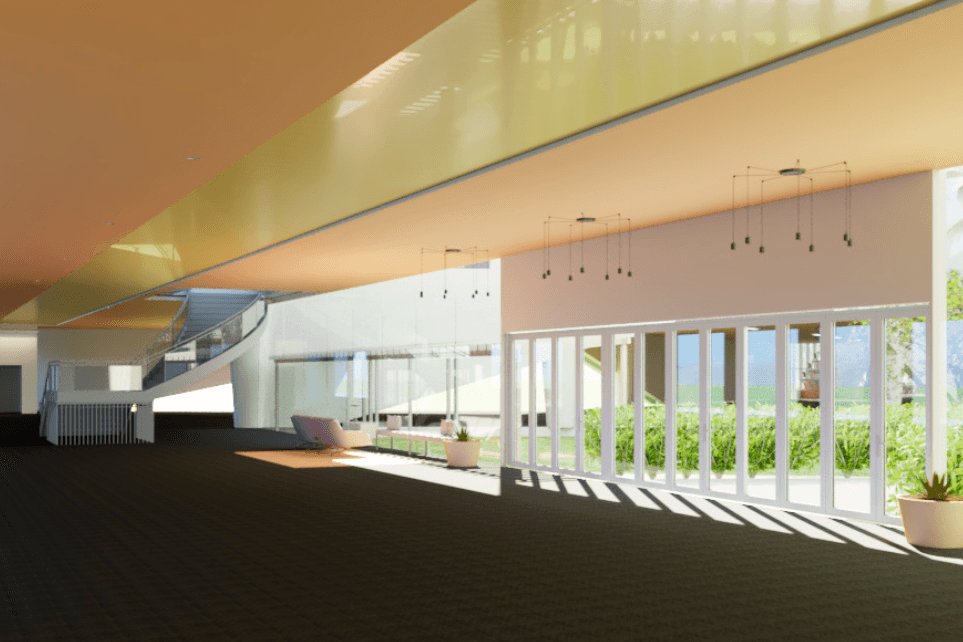
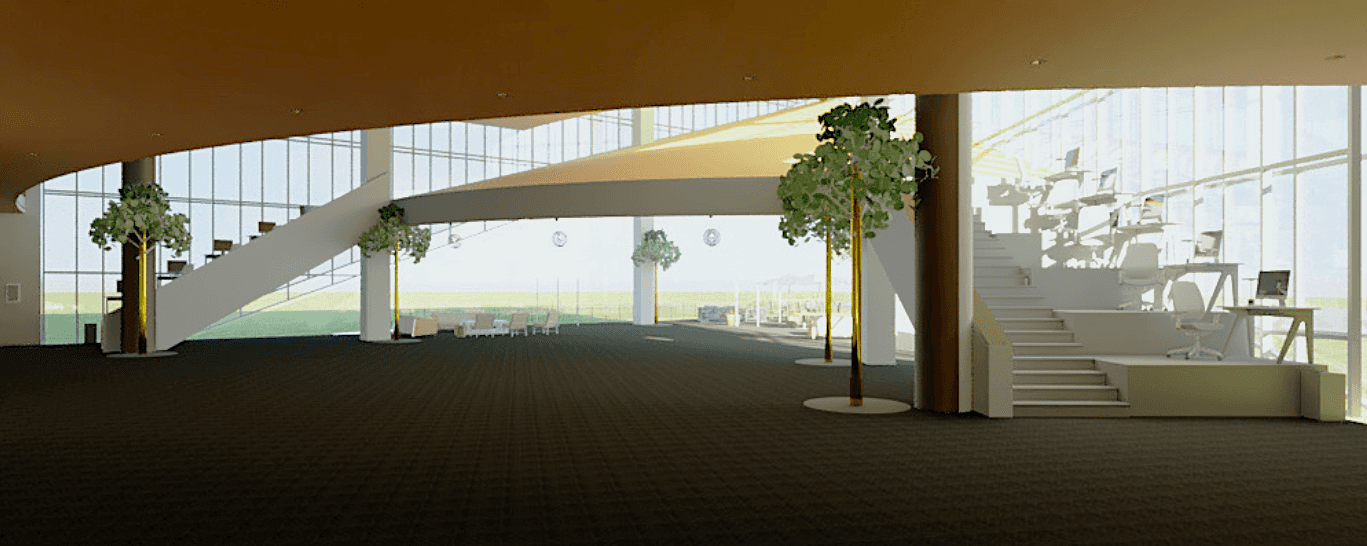
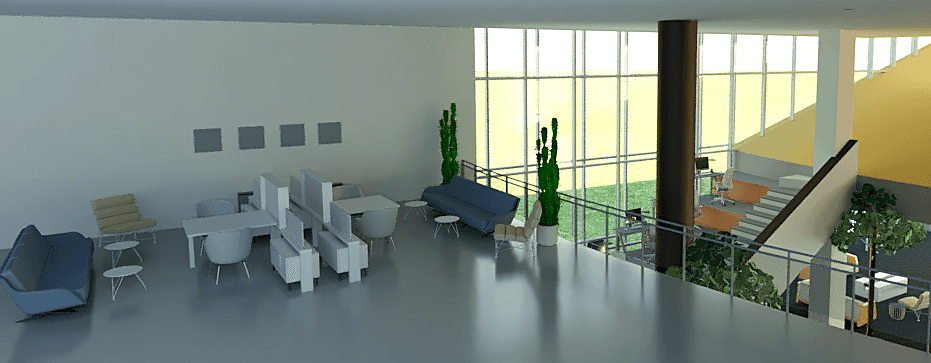
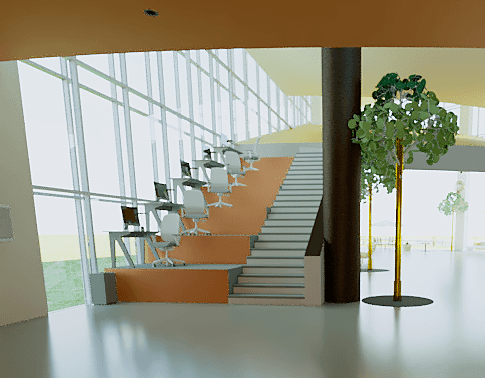
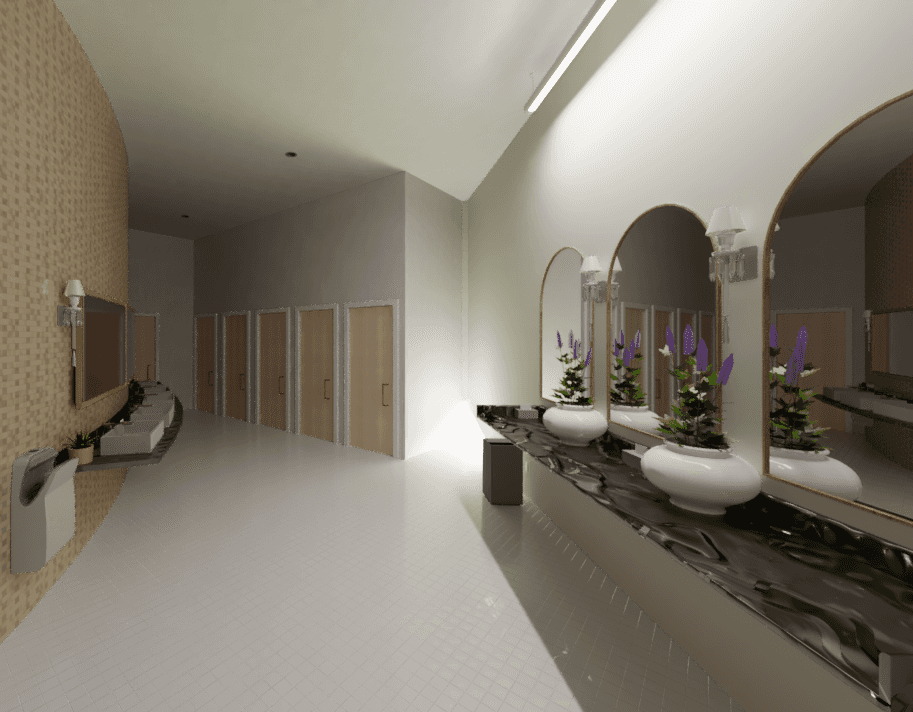
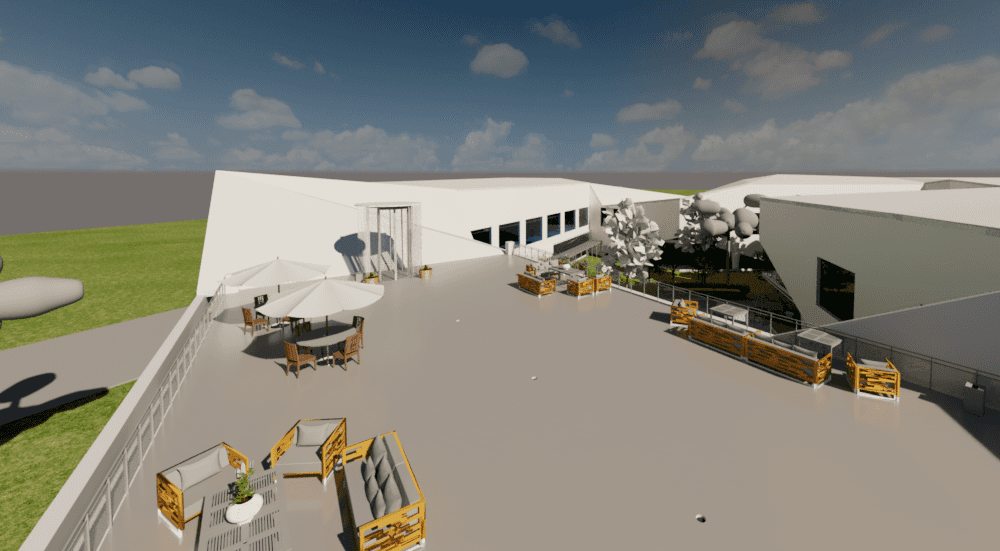
Renderings
Using Revit's Cloud Rendering, I generated images of key areas of both the interior and exterior of the building. A sun study was also conducted to ensure comfortable lighting for occupants at all times of day.
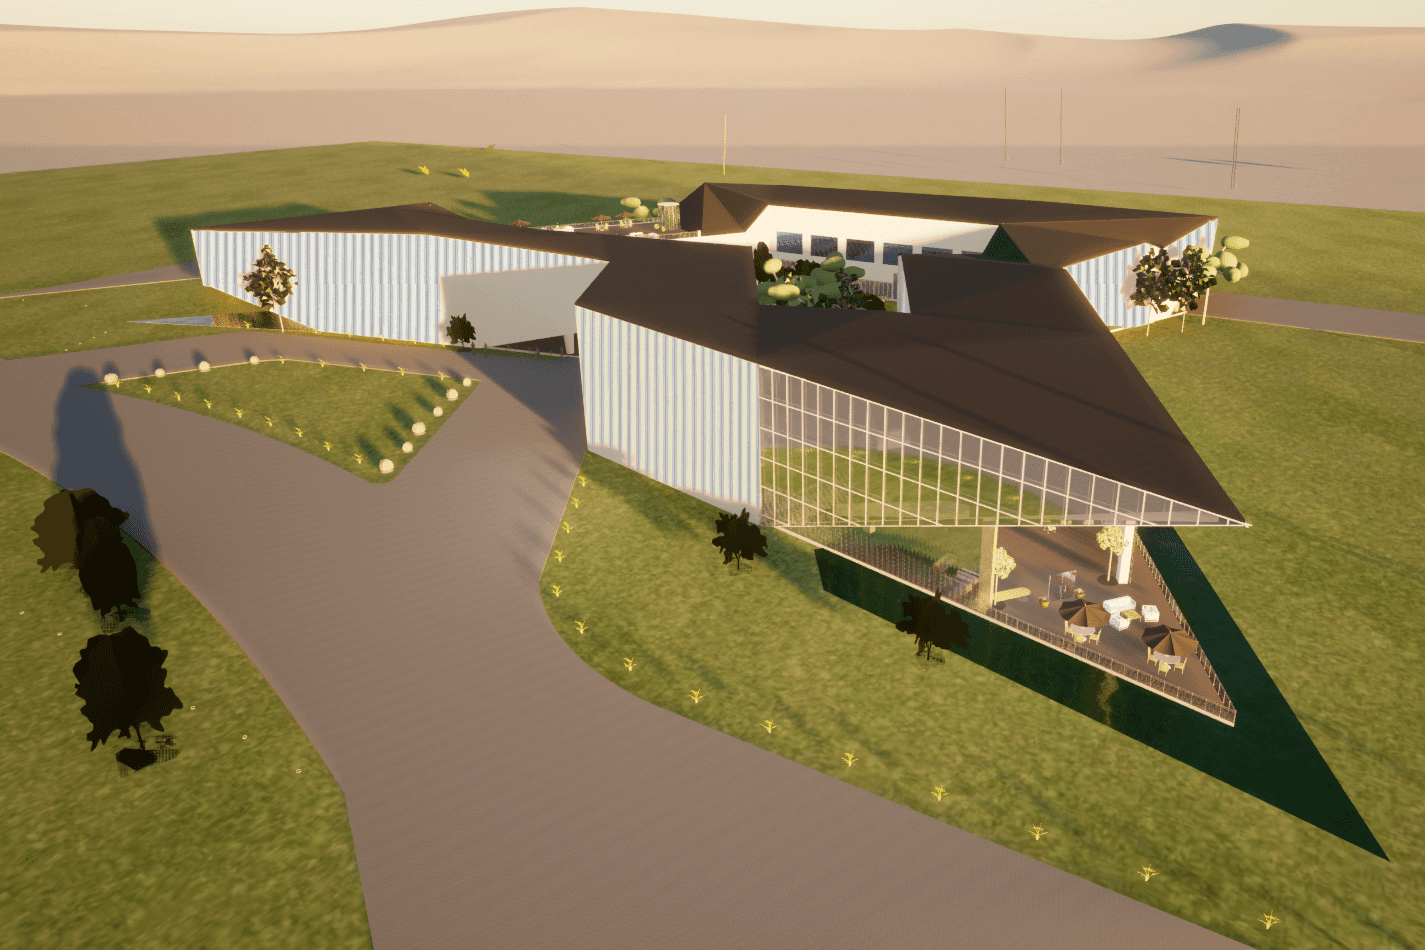
Building Exterior

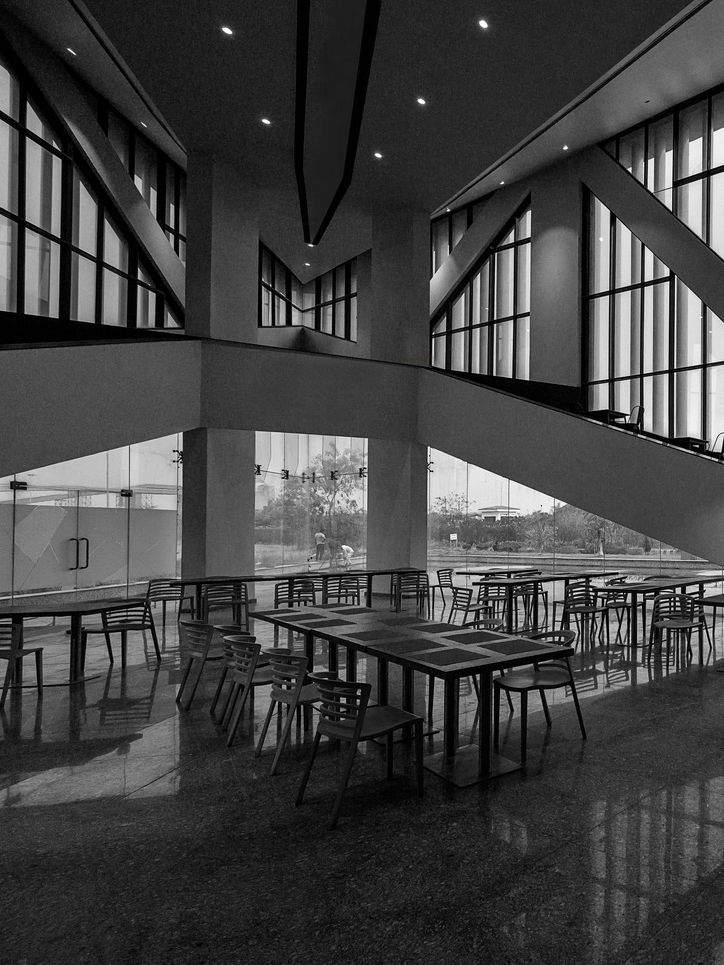
Building Interior
Results
This project marked a great progression in my learning of how to manipulate organically-shaped masses in Revit. While the interior details are sparse, the project illustrates my knowledge in contract document format, and core practices of building within Revit software.
Looking back, I do wish I had spent the time to gather higher-quality renders, although the renders provided are indicative of my progress in creating life-like renderings at the time. The project was completed on time, and the instructor was very pleased with the final product.